> For the complete documentation index, see [llms.txt](https://knowledgebase.autorabit.com/llms.txt). Markdown versions of documentation pages are available by appending `.md` to page URLs; this page is available as [Markdown](https://knowledgebase.autorabit.com/product-guides/arm-1/arm-features/ncino/feature-migration/create-a-feature-migration-template-2.md).
# Create a Feature Migration Template with Predefined nCino Objects
### Overview
This details the step-by-step process to create a standard/community nCino migration template.
### Step-By-Step Guide
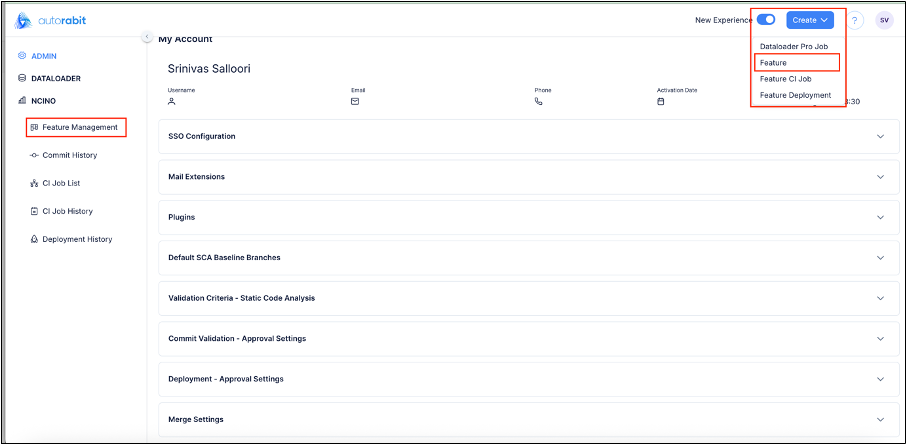
1. The **“New Feature Migration”** template can be created through either of the following options:
* Feature
* Feature Management
2. Click on the “Feature” option under the "Create” drop-down to initiate a new feature migration template creation.
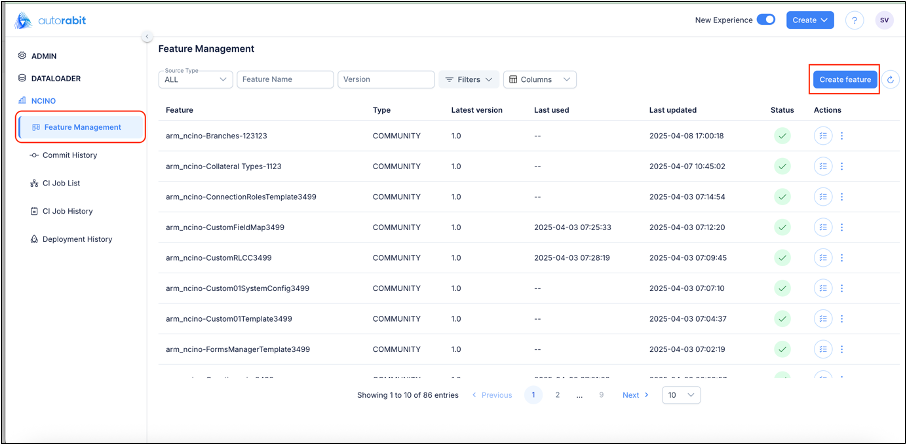
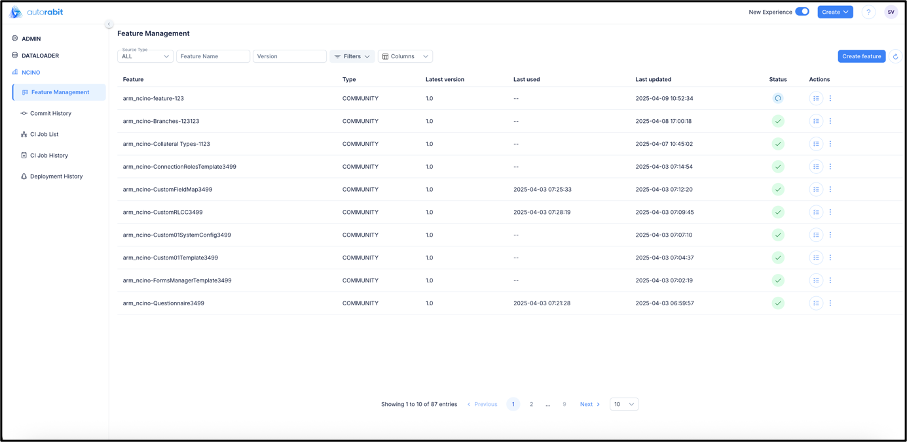
3. Click on the “Feature Management” section under the “nCino” section to navigate to it.
4. Click on the “Create feature” button on the “Feature Management” screen.
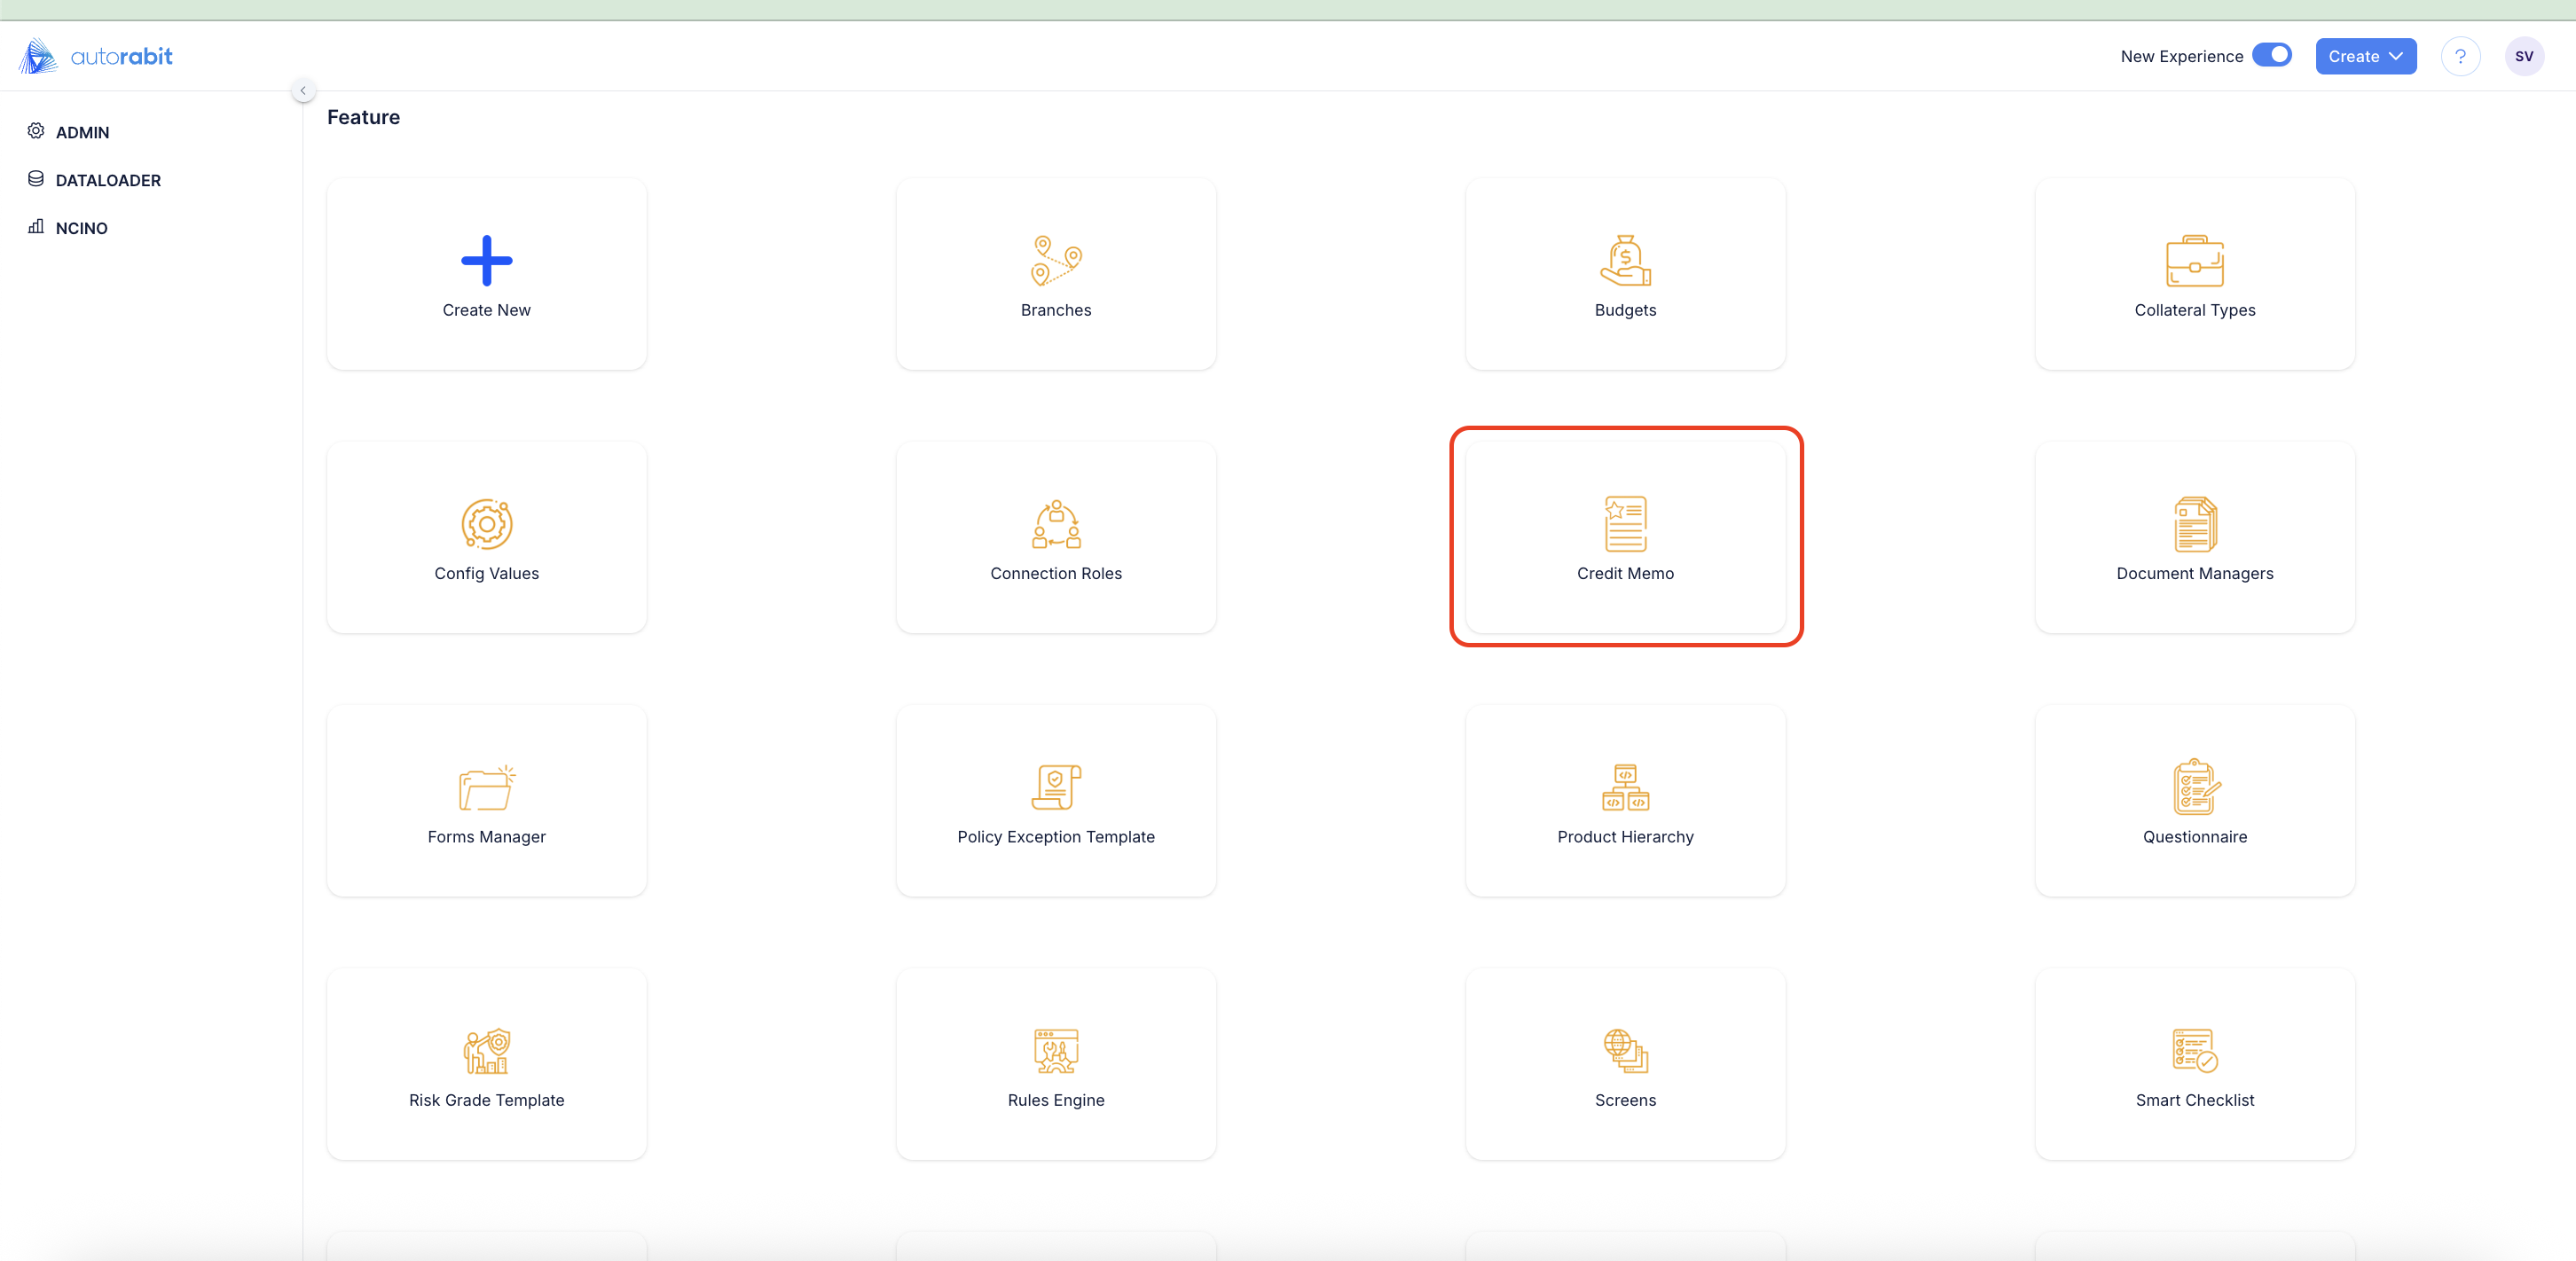
5. Once the selection is made, the creation of the “Feature Migration Template” will be initiated by landing on the "Feature" page.
6. You'll be taken to the record-based configuration section, where you will find three tabs that need completed to proceed:
* Metadata Configuration
* Record Configuration and
* Preview and Save
#### Metadata Configuration
The following screen should be visible on clicking the "Feature" or the "Create Feature" option.
Under **Feature Details**, enter the items below:
1. **Name:** Provide a feature migration template name.
2. **Associated Partner:** The default associate partner would be nCino, which you can change if necessary.
3. **Version:** Enter the version number here. If you're creating the feature template for the first time, it is recommended to keep the version number as 1.0.
Under the **Salesforce Org** **Details** section, do the following:
4. Select the required “Source Org.”
5. On selecting the required “Source Org,” the related objects will be fetched automatically.
6. By default, only nCino objects available in the Source Org will be auto-populated. To view all the objects available, click on **Show All** **Objects**.
1. **Sync Schena:**
1. Overview
The Sync Schema option ensures that the latest metadata structure from the selected Salesforce source org is reflected for the chosen objects. This includes updates to object definitions, fields, and their attributes.
1. **Functionality:** When the Sync Schema option is enabled:
1. The system fetches the latest metadata from the source org for the selected object.
2. Newly added fields are included.
3. Updated field properties (data type, required status, etc.) are refreshed.
4. Deprecated or inactive fields are removed.
5. The object schema in the template is updated before proceeding.
2. **Behavior**
1. Sync is applied only to selected objects.
2. The operation occurs during schema retrieval or object fetch.
3. Existing configurations are updated to match the source org structure.
7. Click on **Next** to go to the **Record Configuration** Tab.
#### Record Configuration
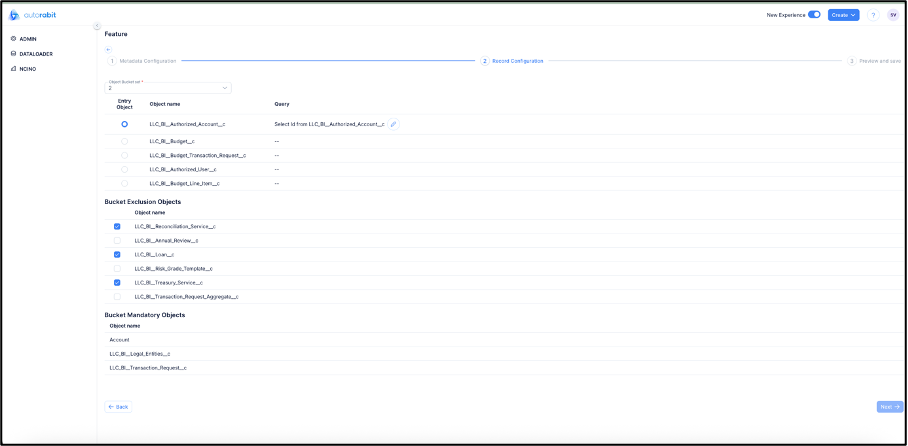
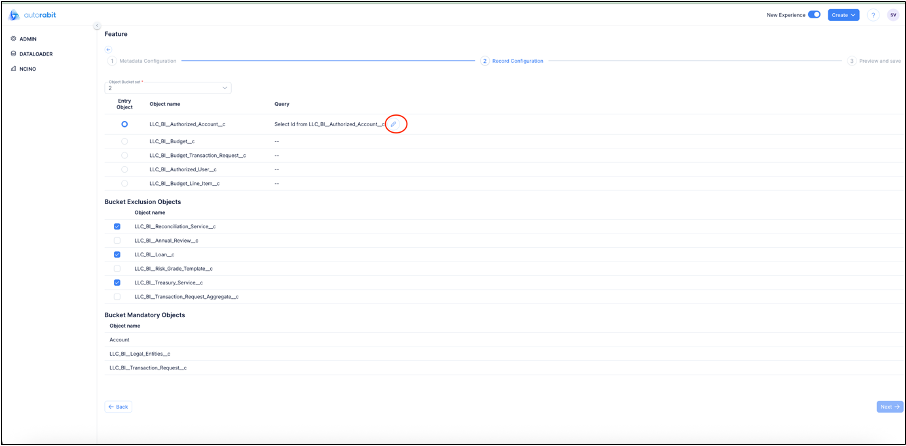
1. The filters can be applied on the entry objects under this tab.
2. The following can be observed under this tab:
* The “Selected Objects” were displayed under the “Object Bucket List” with the columns “Entry Object”, “Object Name” & “Query.”
* Bucket Exclusion Objects: Objects selected here will be excluded from further processing.
* Bucket Mandatory Objects: Objects displayed under this section are mandatory.
3. Based on the relationship between the objects, the AutoRABIT application will segregate the object sets, and applying a filter to each bucket is mandatory. By default, AutoRABIT will denote an object in a bucket as an entry point, which can be applied as a filter. This is not mandatory, but as a best practice, AutoRABIT recommends applying filters to the entry point object rather than any other object.
**Applying the Filters**
The filter criteria can be entered and the query can be built under this tab.
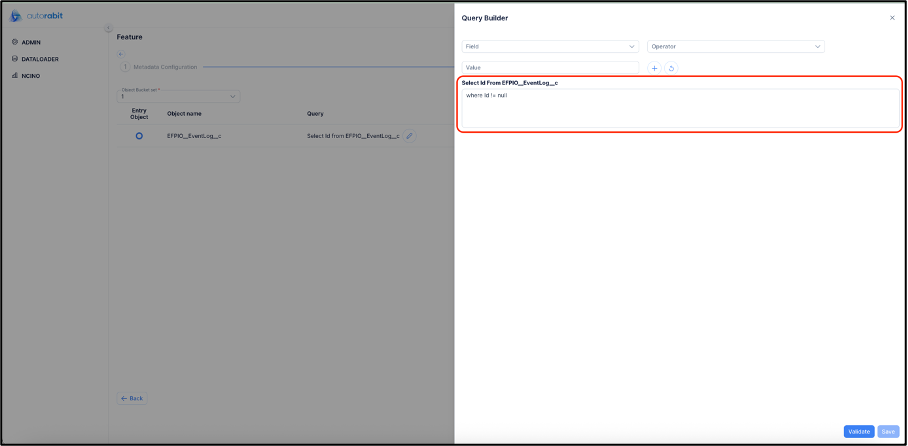
1. Click on the pencil icon beside the query.
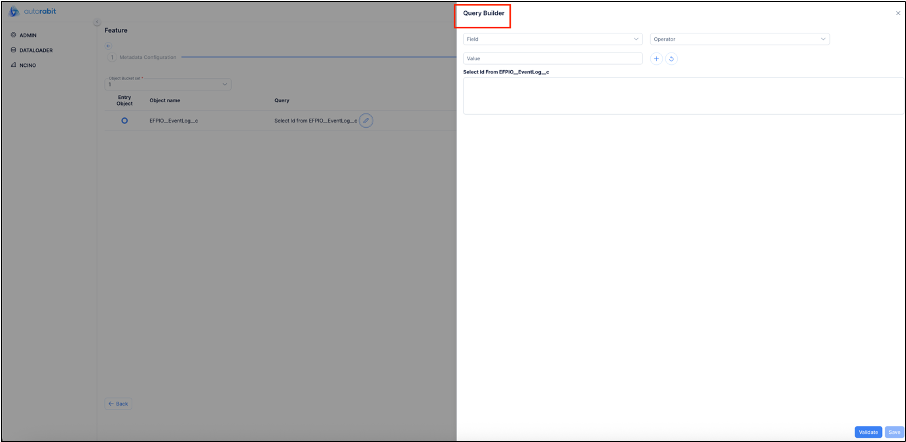
2. On clicking the pencil icon, the ‘query builder’ will be opened.
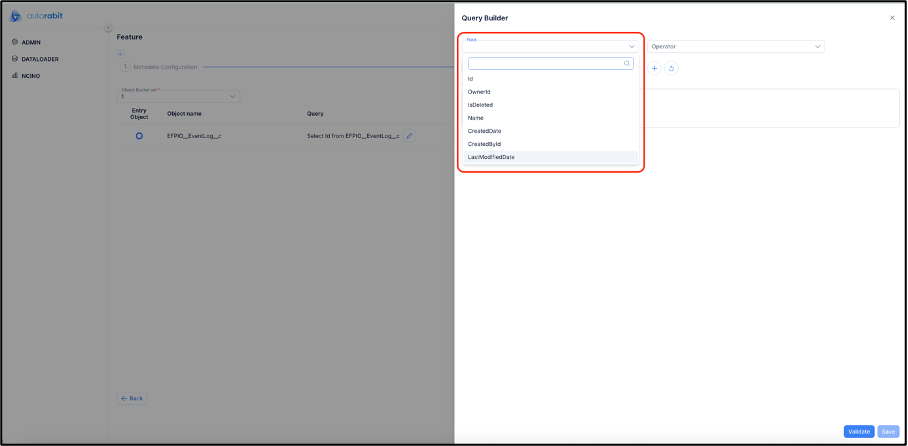
3. Clicking on the ‘field’ drop-down will provide the list of fields from the Org.
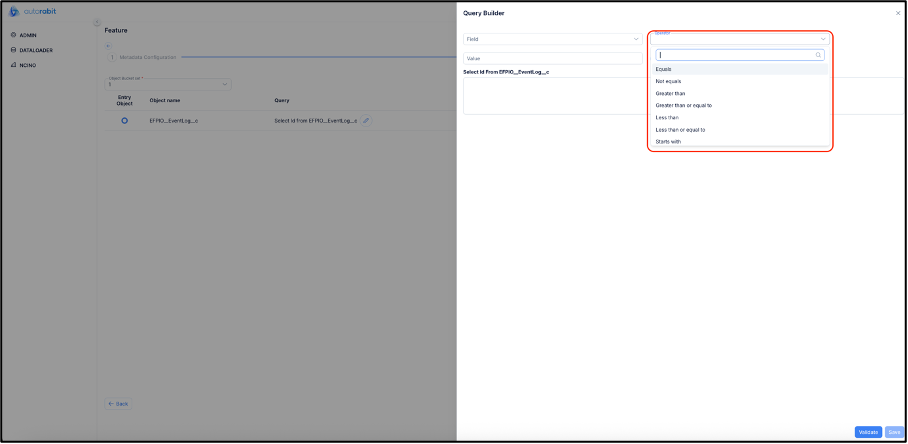
4. By clicking on the operator drop-down field, the available list of operators can be seen.
5. On completing the field selection, click on the ‘ADD’ icon to add the query to the ‘query editor’ below.
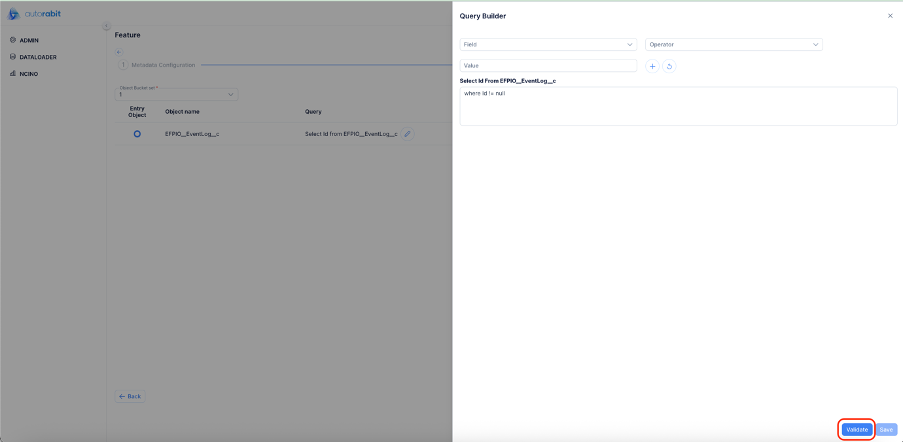
6. Once the query is added to the query editor, the query can be validated by clicking on the ‘Validate’ button.
7. An SOQL query can also be added to the query editor. After adding the query, the query can be validated using the validate option available.
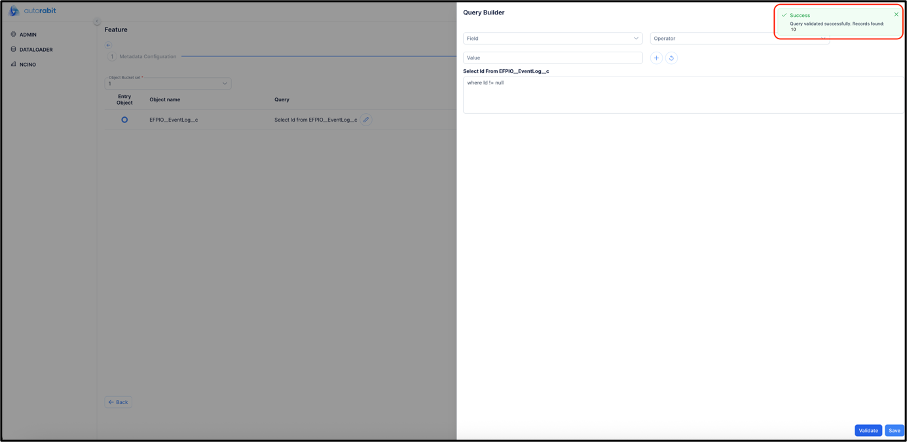
8. On validating the query, the application will display a success message.
{% hint style="info" %}
Important Note:
1. All records that get fetched will be in order by "ASC nFORCE\_\_lookupKey\_\_c." If the "nFORCE\_\_lookupKey\_\_c" is unavailable, then the records will be fetched in order by "ASC Id."
2. For the Attachment object, the filter cannot be applied.
{% endhint %}
3. As the query has been validated, the same query can be saved by clicking on the ‘Save’ button on the ‘Query Builder.'
{% hint style="info" %}
**Important Note:**
1. If your nCino objects include an Attachment object, users must confirm whether they want to fetch the Attachment dataset.
2. Check the number of attachments pulled for the job once the attachment object is selected for the data deployment. For each API call, Salesforce returns at least one and a maximum of five attachments based on the size of the attachments. More API calls will get triggered for more attachments, which may result in the API limit being exceeded and the application reporting an error.
{% endhint %}
3. The query should be added to all the buckets. Click on 'Next' to continue to the “Preview and Save” step of the “Feature Migration Creation.”
#### Preview and Save
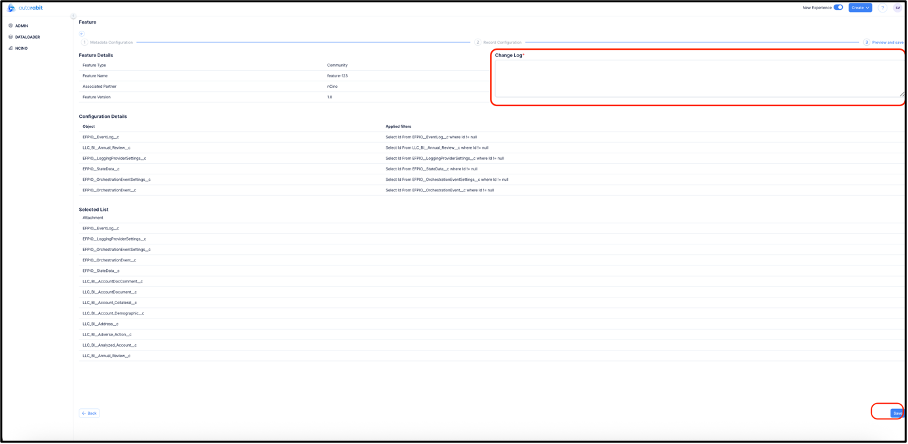
This is the summary of the “Feature Migration Template” that is being created. All the feature details can be observed on the ‘Preview and Save’ page. On the ‘change log’, any change log information required can be added.
{% hint style="info" %}
**Important Note:** **Related List** section will display only if the **Attachment** object is part of the Feature Migration Template.
{% endhint %}
1. On verifying all the details on the ‘Preview and Save’ page, save the template by clicking on the 'Save' button.
2. On clicking 'Save,' you will be redirected to the “Feature Management” page.
---
# Agent Instructions
This documentation is published with GitBook. GitBook is the documentation platform designed so that both humans and AI agents can read, navigate, and reason over technical content effectively. Learn more at gitbook.com.
## Querying This Documentation
If you need additional information that is not directly available in this page, you can query the documentation by asking a question.
Perform an HTTP GET request on the following URL with the `ask` and `goal` query parameters:
```
GET https://knowledgebase.autorabit.com/product-guides/arm-1/arm-features/ncino/feature-migration/create-a-feature-migration-template-2.md?ask=&goal=
```
`ask` is the immediate question: it should be specific, self-contained, and written in natural language.
`goal` is what the user is ultimately trying to achieve, the reason they need the answer. Sharing it helps GitBook give you a better, more relevant answer. A goal is most helpful when it describes the outcome the user wants rather than restating the question. For example, with `ask=how do I create an API token`, a goal like `automate deployments from our CI pipeline` lets GitBook tailor the answer to that use case.
The response will contain a direct answer to the question and relevant excerpts and sources from the documentation.
Use this mechanism when the answer is not explicitly present in the current page, you need clarification or additional context, or you want to retrieve related documentation sections.