# GIT Tag
### Overview
GIT tags are a simple and effective way to keep track of your code's different versions and the important quality of Git's version control. GIT Tag operation allows giving meaningful names to a specific version in the repository. Suppose Timon and Rumba decide to tag their project code so they can easily access it later.
### Creating a new Git Tag
#### A. Create GIT Tag in your Version Control Branch
1. Log in to your AutoRABIT account.
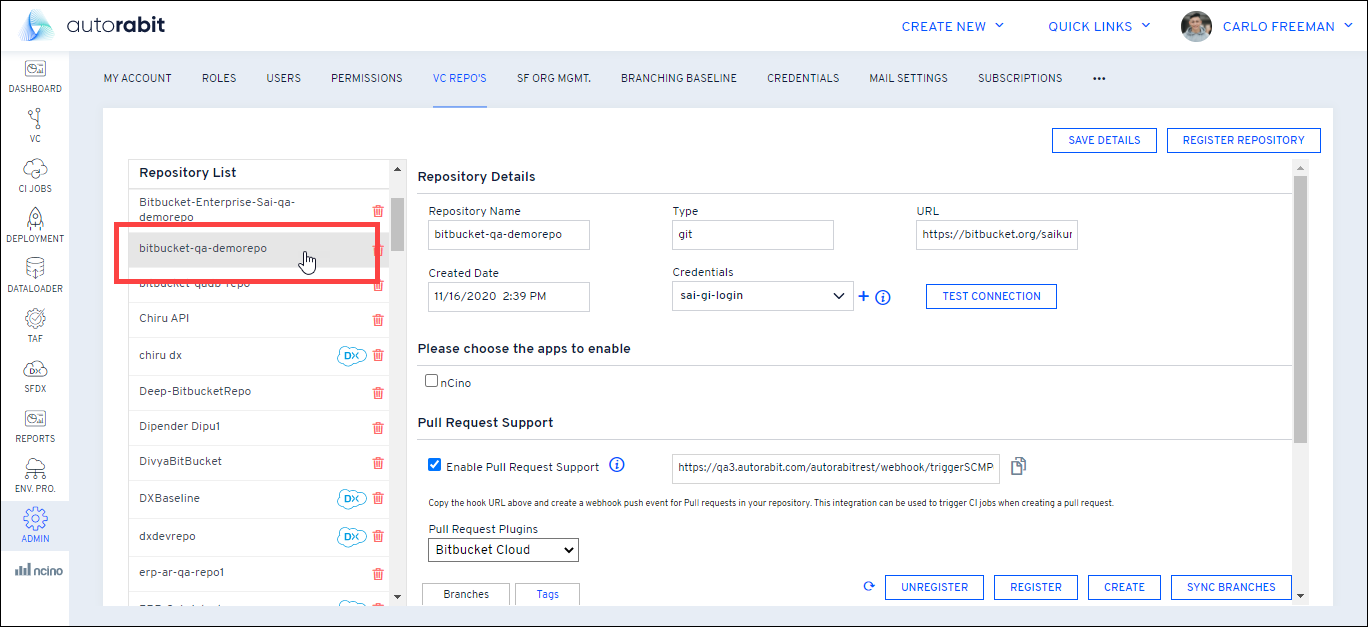
2. From the AutoRABIT home page, click and go to the **VC Repo's** tab.
3. Select your [Version Control ](https://www.autorabit.com/blog/8-benefits-of-version-control-in-salesforce-development/)Repository under **Repository List**.
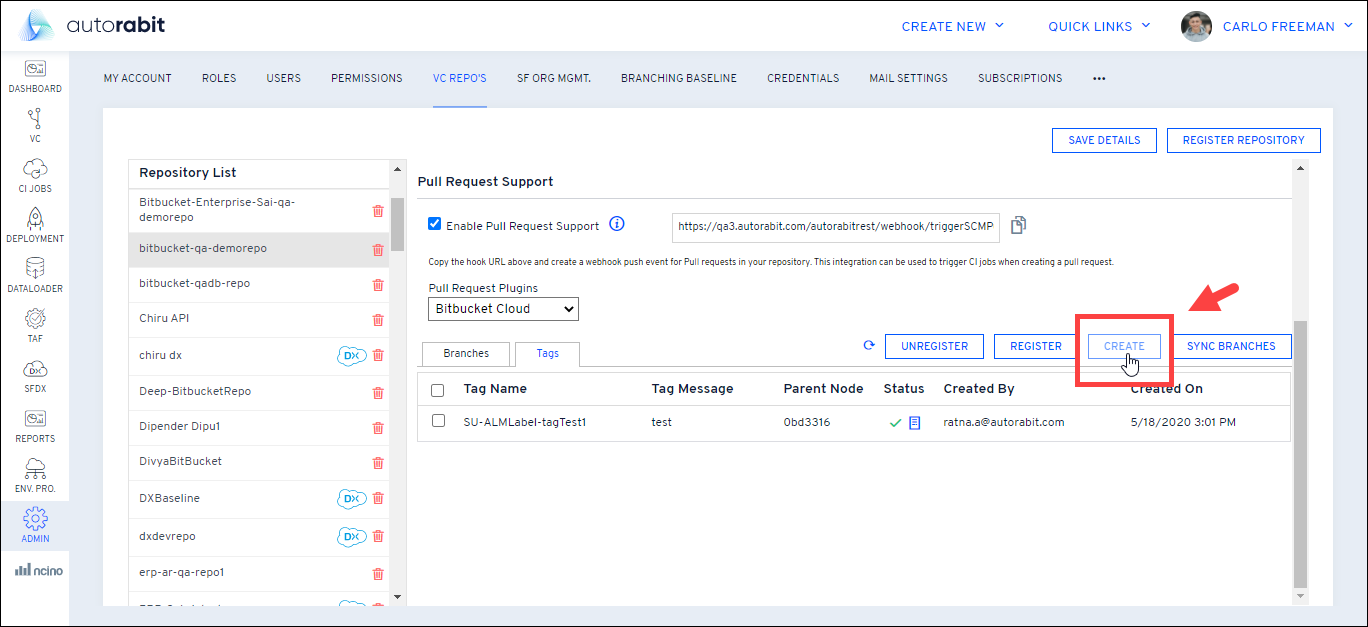
4. Go to the **Tags** tab and click on the **Create** button.
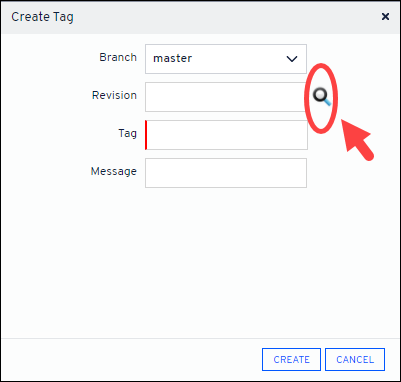
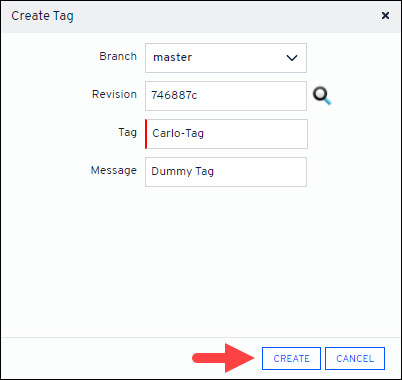
5. In the **Create Tag** screen, select the **VC branch** from the drop-down. The branch that was registered with AutoRABIT for your Version Control repository will be populated here.
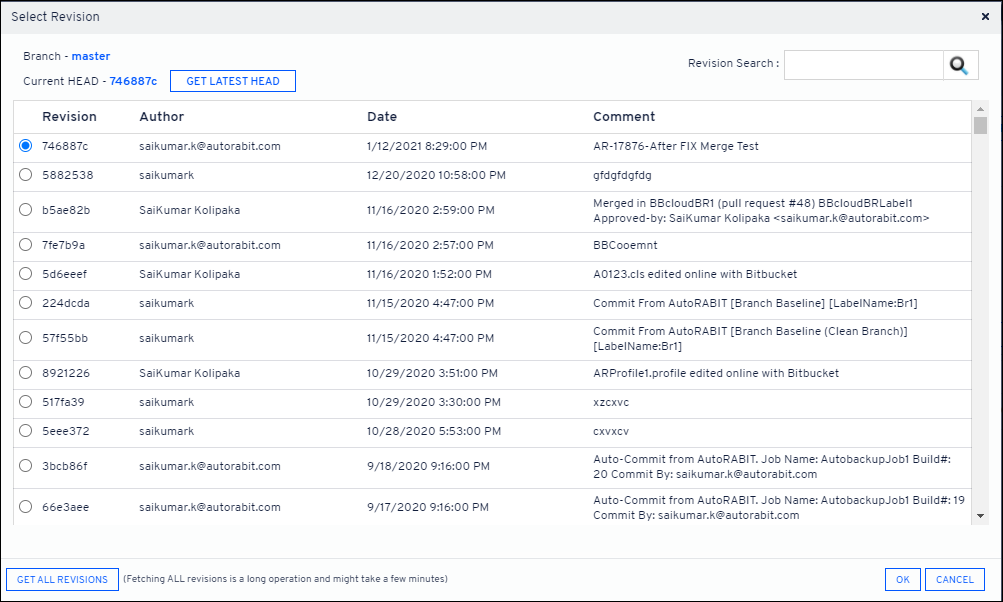
6. Use the **Search** () button next to the Revision field to pull a list of revisions from which you can choose which revision to use in the deployment.
\
**Get Latest HEAD** points out the last commit in the current checkout branch.
7. Give a name for the tag and any additional info in the **Message** section. Click **Create**.
8. A newly created tag will be displayed under the **Tags** section.
#### B. Create GIT Tag during Merge
Once the merge process is completed and pushed to the remote branch, AutoRABIT will create the GIT tag based on your configuration. To do so,
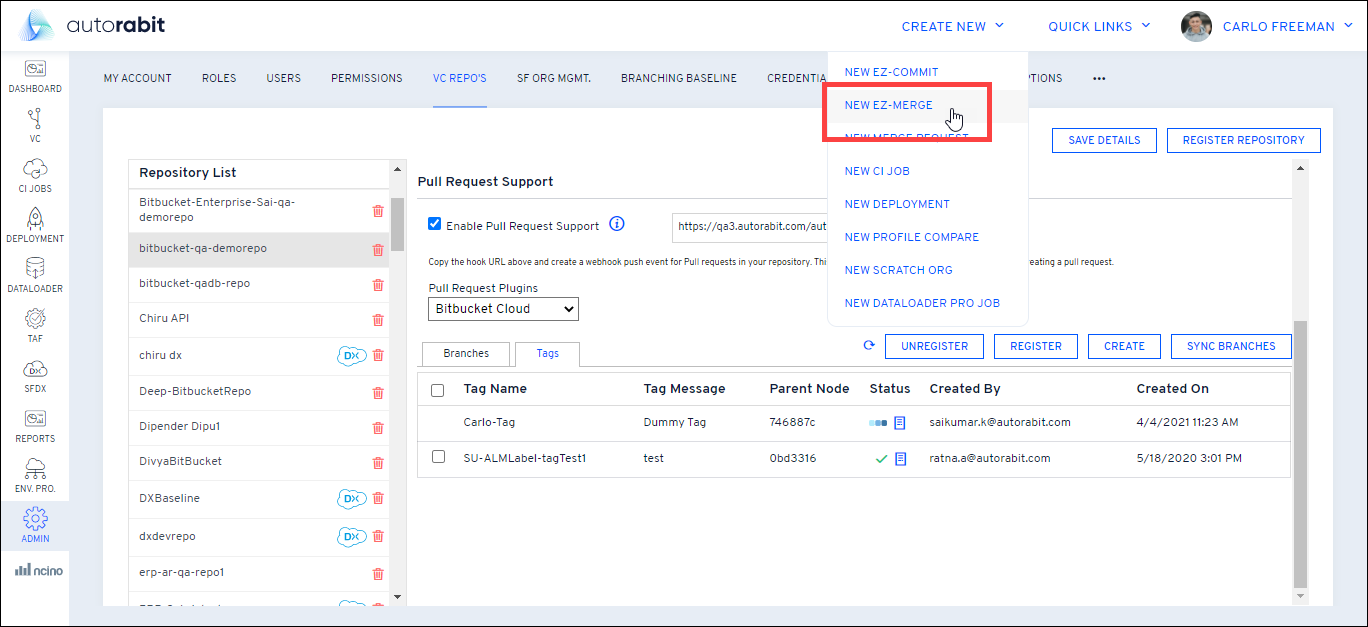
1. From the top navigation pane, navigate to **Create New > New EZ-Merge.**
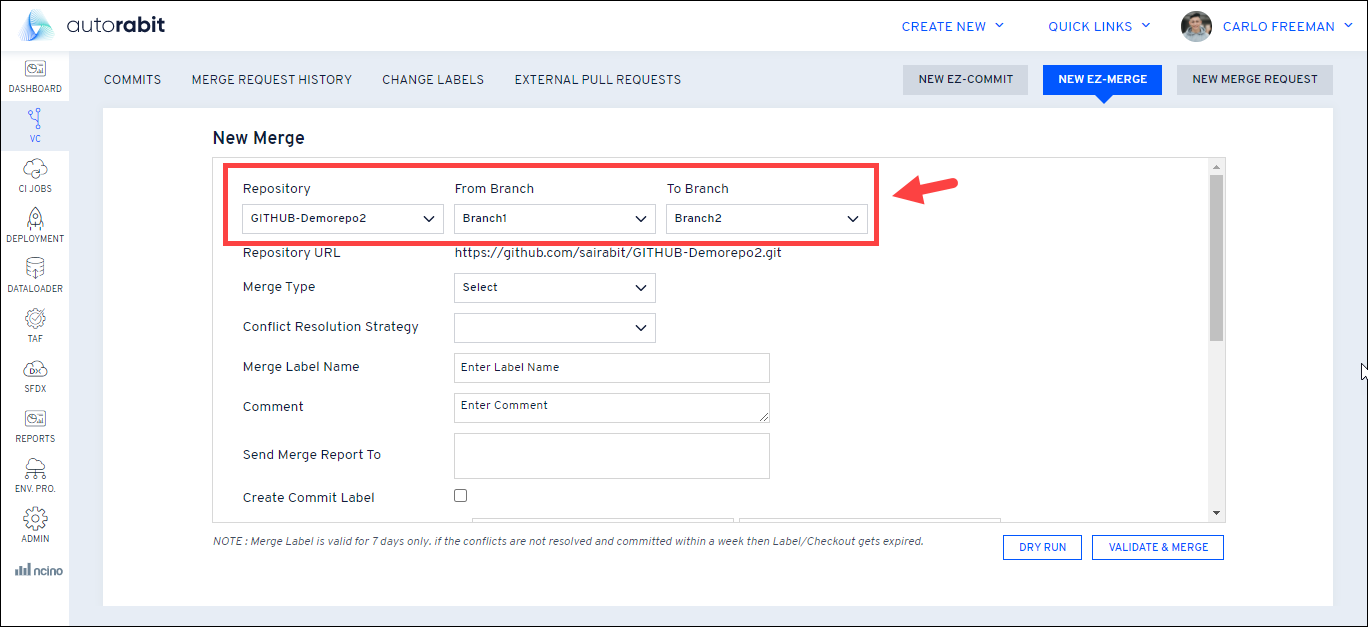
2. On the New Merge screen, select your **GIT Version Control Repository, Base Branch,** and the **Target Branch**.
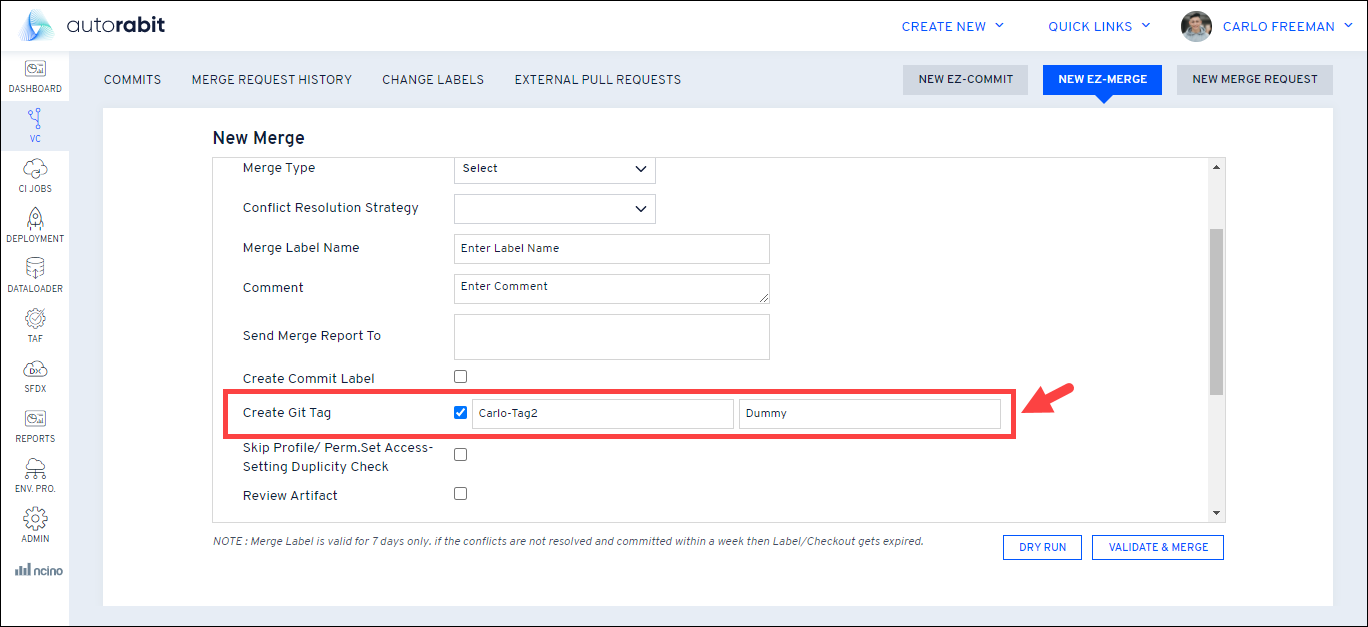
3. Scroll a bit below and you can see the option: **Create Git Tag**. Select this checkbox.
4. Give a name for the tag and any additional info in the message box.
5. Fill in the remaining fields as per your convenience and click on **Merge/ Validate & Merge**. Once the merge process is completed, the GIT tag gets auto-created.
#### C. Create GIT Tag via CI Job
AutoRABIT will create the GIT tag while CI Job is triggered and is successfully build.
1. Go to the **New CI Job** screen.
2. The new CI Job screen gives the job a descriptive name in the **CI Job Name** field.
3. Under **Build**, select your **Version Control Systems,** your **Repository,** and the **Branch**.
4. Go to the **Deploy** section.
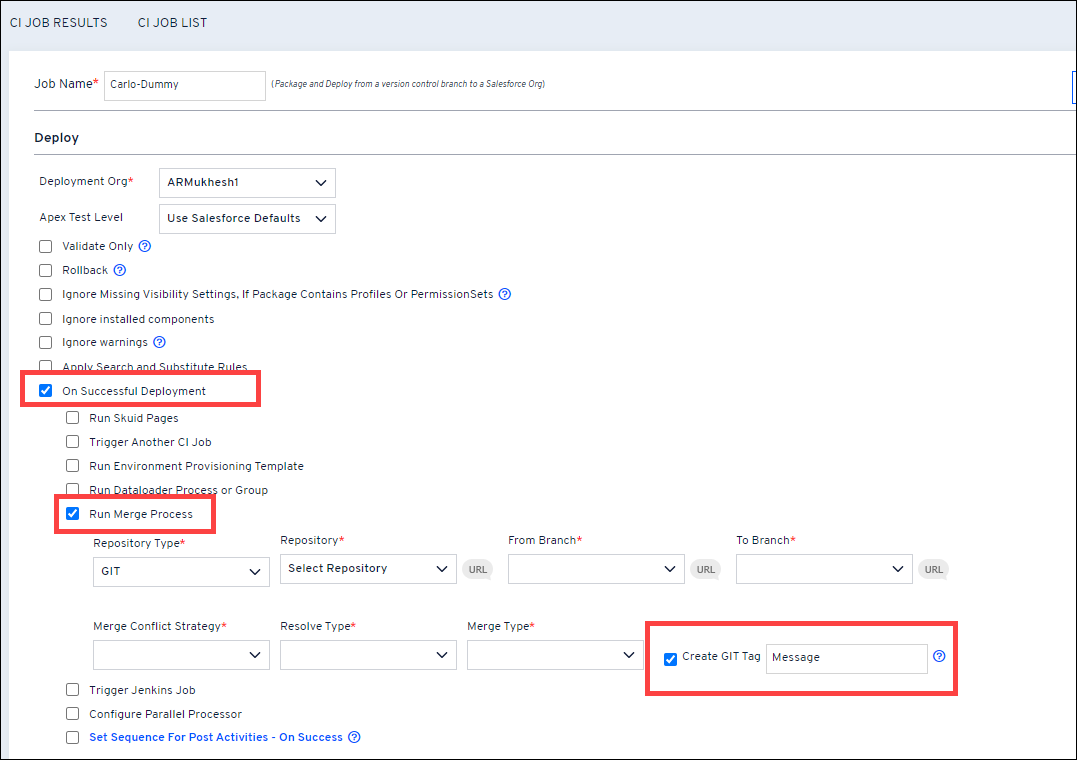
5. Under the **Deploy** section, select your Destination org.
6. Select the checkbox: **On Successful Deployment.**
7. Now, select the checkbox: **Run Merge Process.** This allows running the merge operation automatically once the build is triggered successfully in CI Job. For merge to run, you need to select the Version Control type, source and destination branch, merge type, and how you like to resolve the merge conflicts that may arise during the merge process.
8. Next, select the **'Create GIT Tag'** checkbox and enter any tag message for your reference.
9. Fill in other details as per your wish and click **Save**. When the build is triggered successfully and the merge process is run, a tag will be created based on the **Project\_Buildnumber**.
### Deployment via GIT Tag
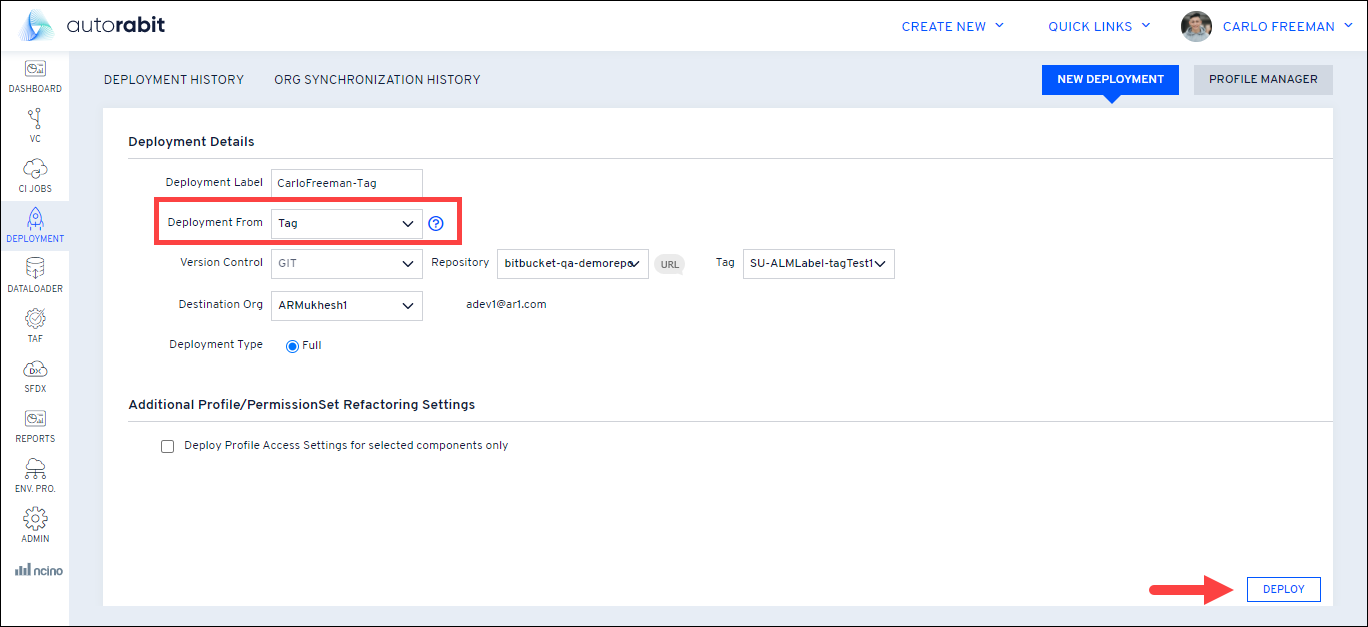
1. In the New Deployment screen, choose **Tag** as a dropdown in the **Deployment From** field.
2. Select the **Version Control Repository** and the **Tag** from the dropdown.
3. Choose the **Destination org** for your deployment.
4. The **Deployment Type** is auto-selected to **Full Deployment** by default. Full Deployment transfers all objects in the source org to the destination org.
5. Once you are done with the selection, click on **Deploy**.
6. The remaining steps are similar to other deployments methods, do refer to the article: [Create and Deploy Changes](/product-guides/arm/arm-features/deployment/create-and-deploy-changes-in-autorabit.md)
---
# Agent Instructions: Querying This Documentation
If you need additional information that is not directly available in this page, you can query the documentation dynamically by asking a question.
Perform an HTTP GET request on the current page URL with the `ask` query parameter:
```
GET https://knowledgebase.autorabit.com/product-guides/arm/registration/version-control-repository/git-integration/git-tag.md?ask=
```
The question should be specific, self-contained, and written in natural language.
The response will contain a direct answer to the question and relevant excerpts and sources from the documentation.
Use this mechanism when the answer is not explicitly present in the current page, you need clarification or additional context, or you want to retrieve related documentation sections.