

GIT Integration
What is Git?
Git is the world's most popular version control system. Version control allows you to maintain a history of changes to text files (such as a codebase) over time, tracking what changes were made, by whom, at what time, and for what purpose. Projects in Git are organized into repositories: a collection of files and changes to those files over time. Git is a distributed version control system, meaning that the main repository can be cloned (for example to a developer's laptop) and changes from multiple developers can be merged and pushed to a shared central repository.
What is a Git host?
A Git host is a service provider who hosts Git repositories. Git hosts may be on the cloud or in corporate, on-premises infrastructure. A Git host provides a central place for teams to synchronize their changes, provides a central backup of the Git repository, and provides other services such as APIs, a user interface, and the ability to create merge requests (aka pull requests). There are many Git hosts. The most popular ones are:
GitHub
Bitbucket
GitLab
Azure Repos
AWS Code Commit (not accepting new customers)
Prerequisites for registering a Git repository with ARM
Before registering Git with ARM, there are some prerequisites.
Ensure you enable the
Gitplugin underPluginsin theMy Accountsection to use Git for version control.
You must have permission in ARM to register a repository.
You must have credentials for the repository you want to access.
You must store these Git credentials in ARM.
Store your Git credential in ARM
This is an initial step in storing your user's credentials (usually a username, password, or token) in ARM. Some Git hosts like GitHub no longer support basic authentication using a username and password. You must now authenticate using an API token, such as an OAuth access token, GitHub App installation access token, or personal access token.
Log in to your ARM account.
Hover your mouse over the
Settingsmodule and click on theCredentialstab.Next, click on
Create Credentialfrom the right navigation bar.
On the next pop-up screen, give a
Credential name.Choose the
Credential TypeasUsername With Password.Enter your
Usernamefor the Git host and API Token (in thePasswordfield), and we will store this encrypted. For more information on how to create an API token, see the Troubleshooting section on this page.

Click
Save.
Registering a Git repository in ARM
To set up a Git repository, follow the steps below:
Log in to your ARM account.
Hover your mouse over the
Settingsmodule and click onRepositories.
Click on
Register Repository.
Select the
Version Control SystemasGiton theRegister Repositorypage.
Enter the name of the repository to display it locally.
Paste the
Repository URLfrom your Git host.Choose the correct user's
Credentialsfrom the list. To create new credentials, click on the **+**icon.
The
Default Branchselection will be in disabled mode by default. Click the icon to fetch and list all the available branches on your remote repository.Select one of the default branches from the list. Note:Ensure the default branch is available in your remote repository with some files committed to it. If no file is available, create a README.txt file and add it to the repository.
Once the registration is done, you can find the newly added repository on
Repositorieshome page.The Sync Branches radio button allows you to view branches that are no longer available in your version control repositories but are still visible in the ARM application, and you can delete them from the ARM application as well.

Troubleshooting
While registering Git with ARM, Git fails to connect, resulting in Authenticate Failure. This is because your credentials are invalid. Check the URL, username, and API token (or other authentication mechanism).
Troubleshooting
While registering GIT with ARM, GIT fails to connect, resulting in Authenticate Failure. This is because GitHub no longer supports basic username and password authentication. You must now authenticate to GitHub with an API token, such as an OAuth access token, GitHub App installation access token, or personal access token, depending on what you need to do with the token. For more information, see the blog post.
Creating a Personal Access Token
This section guides you through creating your personal access token directly on GitHub.
Log in to your GitHub account.
In the upper-right corner of any page, click your profile photo, then click
Settings.
In the left sidebar, click
Developer settings.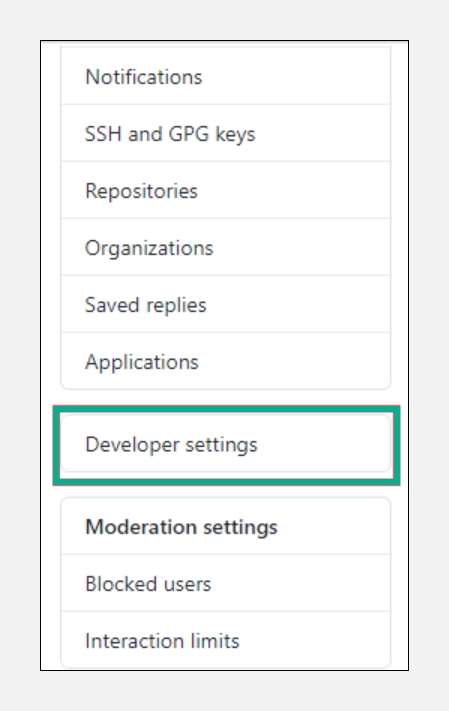
In the left sidebar, click
Personal access tokens.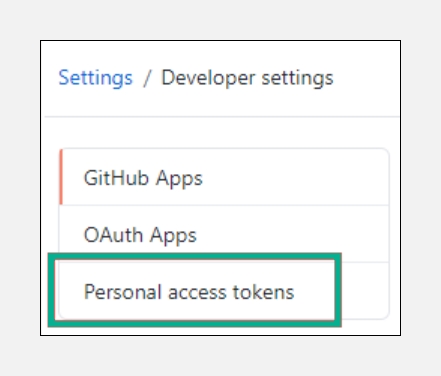
Click
Generate new token.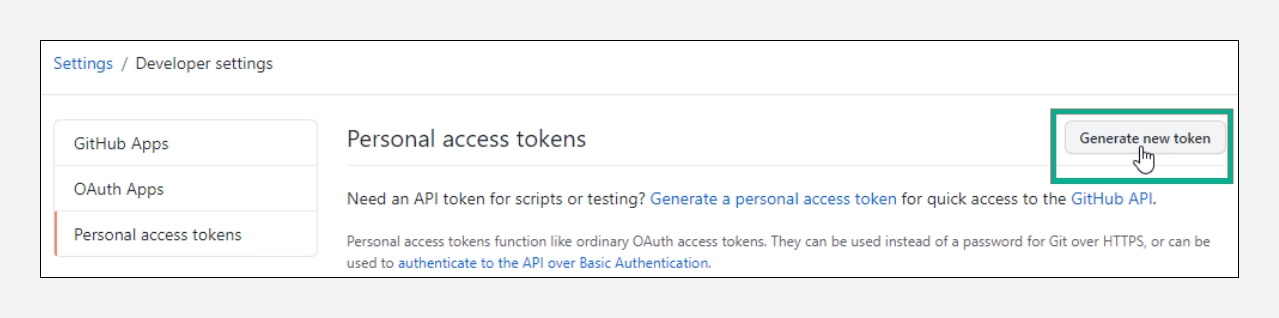
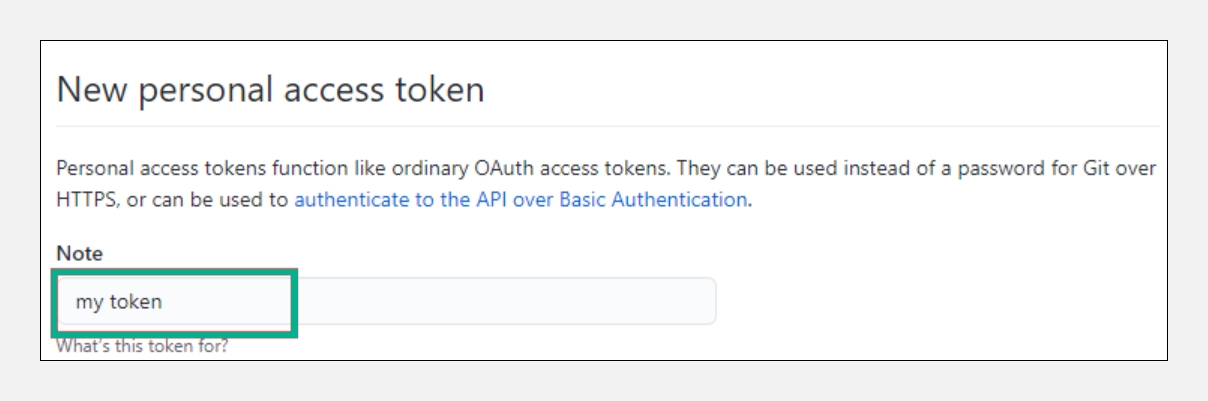
Give your token a descriptive name.
Select the scopes or permissions you want to grant this token. Select
repoto use your token to access repositories from the command line.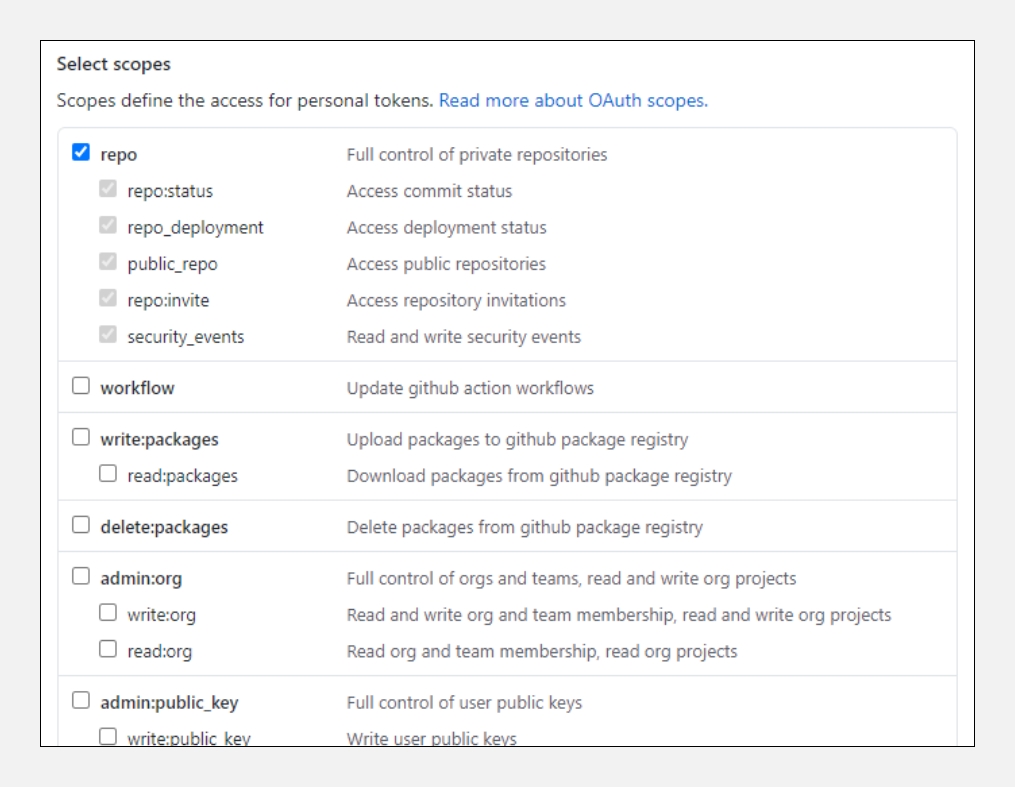
Click
Generate token.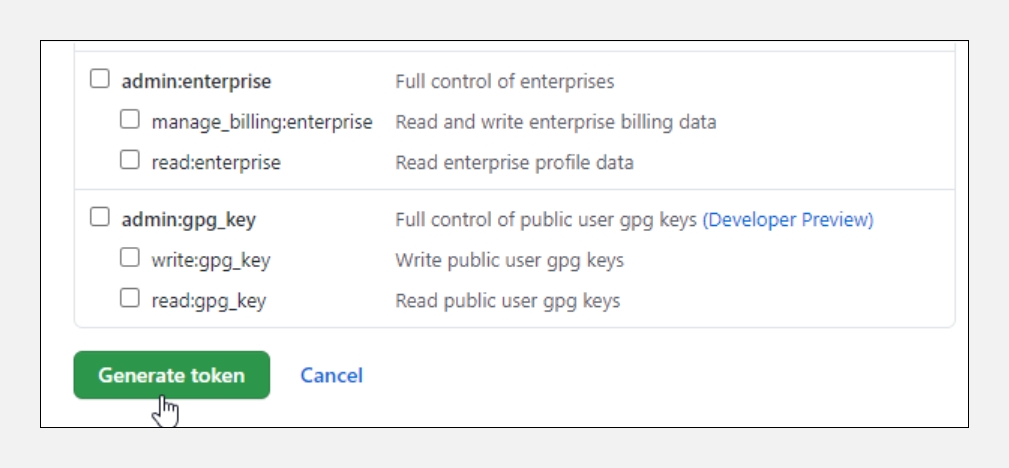
Click
 to copy the token to your clipboard. You cannot see the token again after navigating off the page for security reasons.
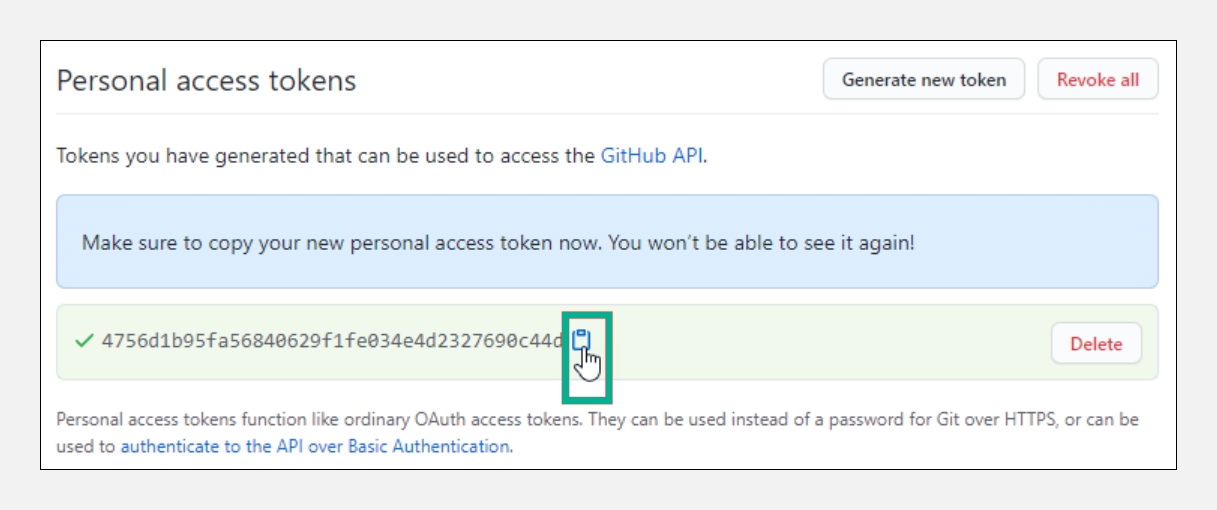
Use the copied token as a password for creating/updating the credential in ARM.
Once updated, please use the same credential to authenticate the GIT.Important Note:Treat your tokens like passwords and keep them secret. When working with the API, use tokens as environment variables instead of hardcoding them into your programs.
Last updated
Was this helpful?