

Creation of a TFS Branch
Creation of a TFS Branch
Log in to your ARM account.
Go to the
VC Repo'stab.Select a TFS repository for which the branch needs to be created.
Click on
Createbutton.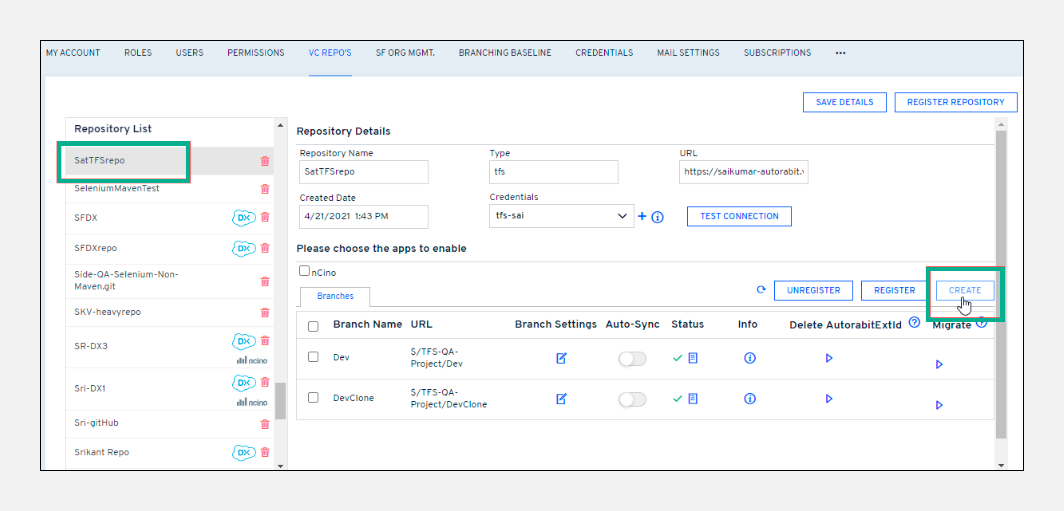
In the
Create Branchscreen, enter a branch name in theDisplay Namefield.Point to Note:The characters "//" \ , * ? & ' " < > | ` ~ ( ) and space are not allowed in theDisplay Namefield.Select your
Credentialfrom the drop-down field.Under the
Target URLfield, do the following:The
Repositoryfield is auto-filled.Enter your
Project Name.Enter your
Branchname.
Under the
Parent URLfield, do the following:The
Repositoryfield is auto-filled.Enter the
Project Namefrom which data is to be fetched.Enter your
Branchname.
Click
Create.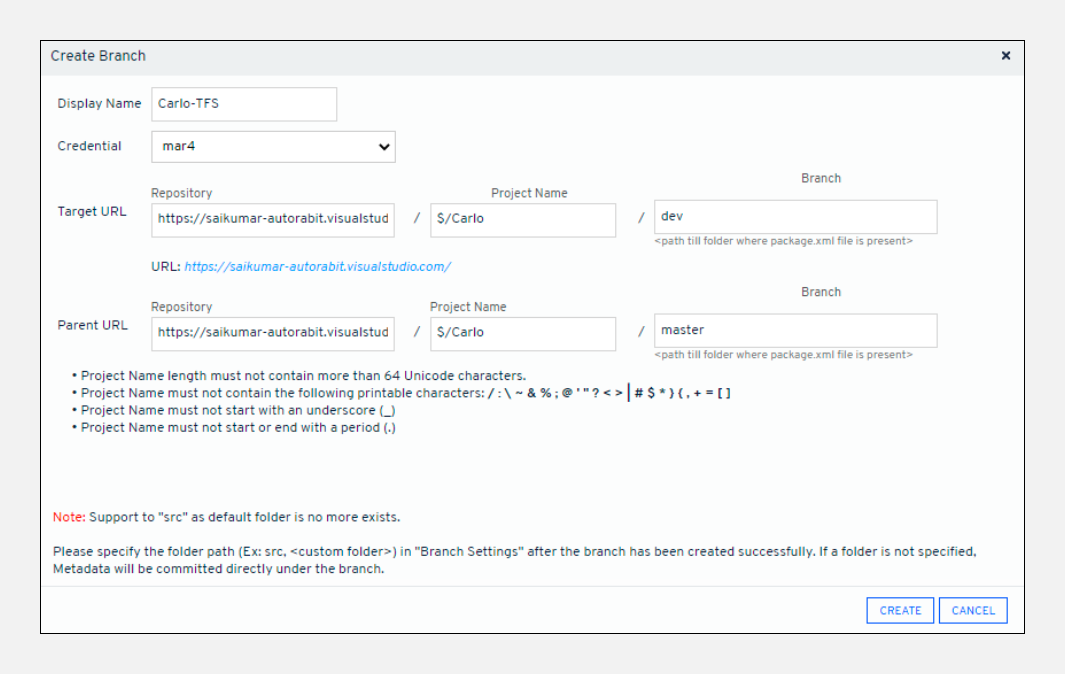
Registration of an existing TFS branch
On the
VC Repo'spage, select a TFS repository from theRepository List.Click on
Register.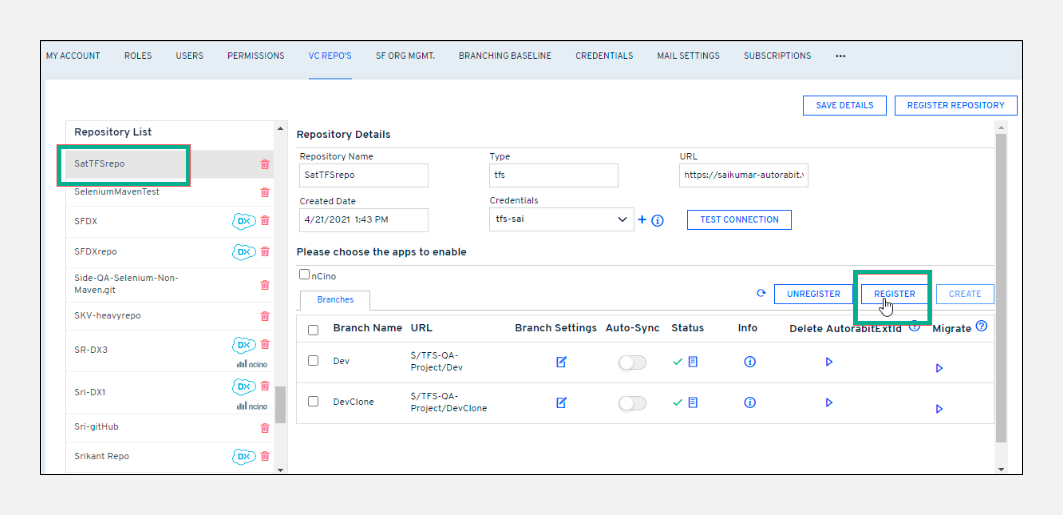
On the next screen, enter the
Display Nameof the branch that you want to register in ARM.Point to Note:The characters "//" \ , * ? & ' " < > | ` ~ ( ) and space are not allowed in theDisplay Namefield.The
Repositoryfield is auto-filled with the URL entered when registering the repository.Select the
Last Commit Date. The last commit date fetches changes from Salesforce org in EZ-Commit based on the specified date.Click
Registerto complete the registration of the branch.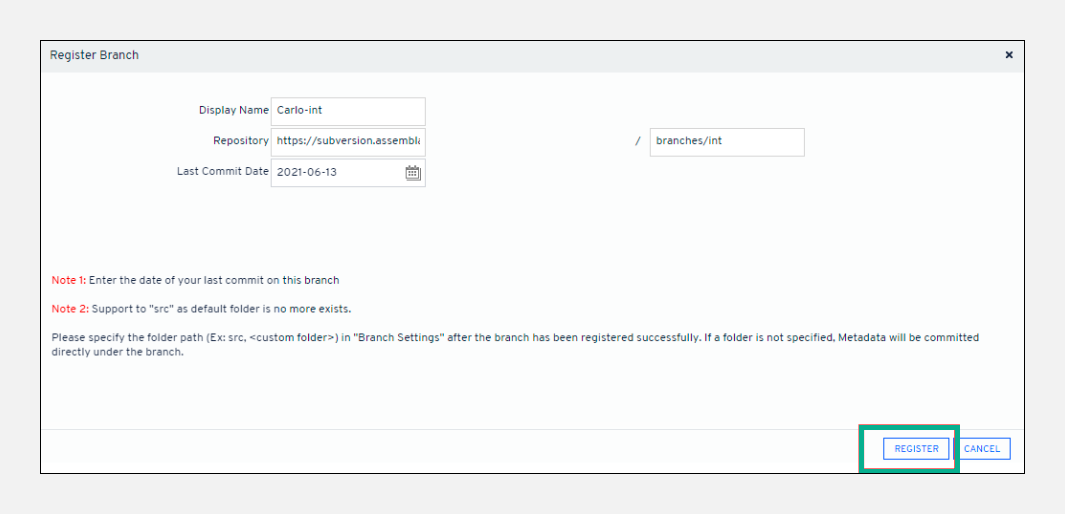
Last updated
Was this helpful?