> For the complete documentation index, see [llms.txt](https://knowledgebase.autorabit.com/llms.txt). Markdown versions of documentation pages are available by appending `.md` to page URLs; this page is available as [Markdown](https://knowledgebase.autorabit.com/product-guides/arm/arm-features/version-control/change-labels/release-labels.md).
# Release Labels
## Overview
A Release Label in the ARM application serves as a powerful tool for managing and deploying changes efficiently. By combining multiple commit labels into a single Release Label, teams can bundle together various revisions or code updates into a cohesive package. This approach allows for the seamless deployment of several related updates at one time, reducing the risk of partial deployments and ensuring that all interdependent changes are introduced simultaneously.
**The use of Release Labels provides significant benefits, such as:**
* Streamlined Deployment: Instead of deploying individual revisions separately, Release Labels allow you to deploy multiple updates at once, saving time and reducing complexity.
* Improved Coordination: Release Labels help teams organize and track related updates, making it easier to coordinate large releases or multi-feature rollouts.
* Reduced Risk: By bundling related changes, Release Labels reduce the risk of incompatibility issues that can arise from deploying revisions independently.
This article will guide you through the process of creating a new Release Label in the ARM application, helping you enhance deployment efficiency and maintain control over your release management process.
**Before you begin:**
1. Confirm you have the Manage Label permissions to create a new release label.
2. Ensure commit revisions were made to the version control branch to combine them under a single Release Label. For more information, refer to the article: [Commit Labels](/product-guides/arm/arm-features/version-control/change-labels/commit-labels.md)
## Create a new Release Label
1. Log in to your ARM account.
2. Hover your mouse over the [**`Version Control`**](https://www.autorabit.com/blog/do-i-really-need-salesforce-version-control/) module and click on the **`Change Labels > Release Labels`**or go directly to the **`Change Labels`** tab and select **`Release Labels`** from the dropdown.
{% hint style="info" %}
**NOTE**: The **Release Label** screen is best viewed when the zoom setting is set to **80%** on your Chrome/Firefox browser.
{% endhint %}
3. Click on **`Create Release Label.`**\\
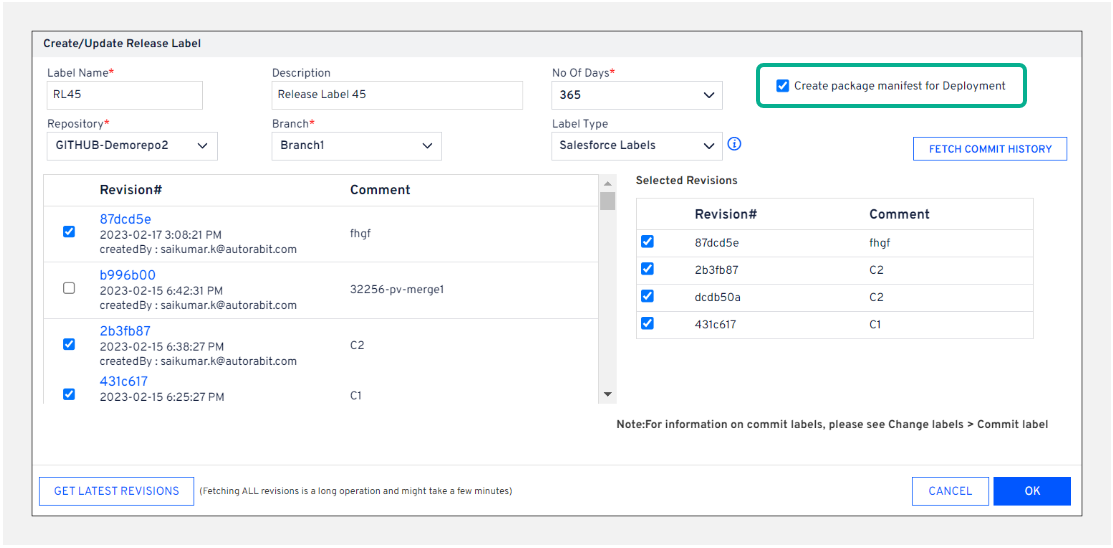
4. On the next screen, give the release label creation process a **`Label Name`** and a short **`Description`**.
5. Select the **`Repository`** and the **`Branch`**containing the commit labels.\
\
Note: For the version control repository registered in the SFDX structure, you must choose an additional option: Package Directory. To learn more about Package Directory, refer to: [Salesforce DX Metadata Format](/product-guides/arm/arm-features/salesforce-dx/salesforce-dx-metadata-format.md).
6. Select the commit **`Label Type`**, i.e., **`Salesforce`** or **`Vlocity`**.
{% hint style="info" %}
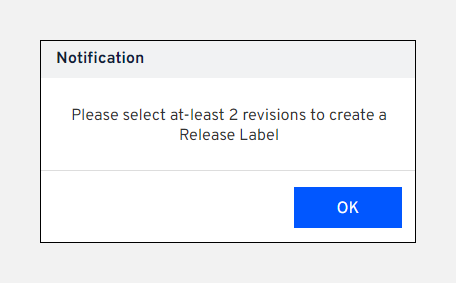
**Important Note:** If you choose just one revision while creating a new release label, a notification message asks you to select at least **two revisions**. You can choose the **Single Revision** option directly from the dropdown on the **New Merge** screen to perform a merge using only one revision. This helps avoid the creation of unnecessary release labels.
{% endhint %}
**Supported Components for Delta Metadata Generation in Release Label Deployments**
Delta generation is restricted to specific metadata types for DX and non-DX Release Labels, ensuring consistent and efficient processing by focusing on compatible key metadata. Only the components listed above are supported for delta metadata generation in Release Label Deployments. Metadata types outside of these lists are not currently supported, which applies to both DX and non-DX Release Labels.
Note: For a Release Label Full deployment in Salesforce DevOps, no metadata will support incremental (delta) changes. Instead, the deployment will include a complete package based on the updated files, containing the entire file rather than just the changes.
**DX Release Labels**\
When deploying with DX Release Labels, delta metadata is generated only for the following components:
* autoResponseRules
* bot
* escalation Rules
* matchingRule
* labels
* object
* sharingRules
* workflow
**Non-DX Release Labels**\
When deploying with non-DX Release Labels, delta metadata is generated only for the following components:
* autoResponseRules
* bot
* matchingRule
* labels
* object
* translation
* sharingRules
* workflow
1. Select the commit **`Label Type`**, e.g., **`Salesforce`** or **`Vlocity`**.
{% hint style="warning" %}
**Known Limitation:** If a branch-to-branch merge involves multiple commits that include data from Vlocity and Salesforce components, ARM cannot classify those commits as **Vlocity** or **Salesforce** components.
{% endhint %}
2. From the **`No of Days`** dropdown list, you can choose to retrieve the commit history for the previous **30**, **60**, **90**, **120**, **180**, or **365** days or **ALL** the commits at once. Please note that selecting **ALL** may result in a slight delay in fetching the entire commit history.
3. You can create a release label and start the artifact preparation immediately by selecting the **`Create package manifest for Deployment`** checkbox for Salesforce labels. If you do not select this checkbox on this screen, you can still click the **`Create Artifact`** button on the **`Release Label Summary`** screen to create and run a package manually.\\
4. Click **`Fetch Commit History`** to retrieve all the revisions available on your selected repo and branch. If no records appear, then no revisions were committed to the branch.
5. Select two or more revisions from the left column to group them into a single Release Label. The **`Selected Revisions`** are displayed in a second column on the right side to make it easier to see. You can also unselect revisions from this section.
AutoRABIT now supports selective deployments directly from pre-prepared artifacts, allowing developers to deploy specific components without additional Git operations. This approach improves deployment efficiency by reducing time and minimizing the risk of errors typically associated with manual Git processes. By enabling artifact-based component selection, AutoRABIT streamlines selective deployments, making production releases faster, more reliable, and enhancing the overall release management process. Read the Knowledge Article: [Selective Deployments Using Pre-Prepared Artifacts](https://knowledgebase.autorabit.com/product-guides/arm/arm-features/version-control/change-labels/release-labels/selective-deployments-using-pre-prepared-artifacts) for more information.\
\
Important Note: If you choose just one revision while creating a new Release Label, a notification message asks you to select at least **two revisions**. You can choose the **Single Revision** option directly from the dropdown on the **New Merge** screen to perform a merge using only one revision. This helps avoid the creation of unnecessary release labels.\\
1. Click **`OK`**. The newly created release label will be displayed on the **`Release Labels Summary`** screen.
\\
It's always a good idea to break data into multiple pages when dealing with multiple-label records. You can browse **25**, **50**, **75**, or **100** records on a single page or navigate to the previous or next page using the **`Previous`** and **`Next`** buttons.
#### Release Labels Summary
The **`Release Labels Summary`** screen has been designed to enhance user experience and displays the following detailed information for each release label created:
1. At the top left is where you can see the **`Repository`** dropdown. You can choose a different repository from the dropdown list.
2. The **release label name**, the **date** and **time** it was last updated, and the **version control branch**.
3. The release label **description**.
4. The release label **package status**: **Completed**, **Failed**, **Package Not Prepared**, **In-progress**, or **Aborted**. Abort an ongoing package preparation using the  icon; the  icon indicates an aborted process, and the icon indicates the release label package creation is a success.
* Click on the  icon to view the latest version log.
* Click on the  icon to download the package.xml file in a .zip format.
5. Click on **`View Dataset`** to view the components in that release label package. You can view the components in **`JSON View`** or **`Tree View`**.
6. Click on the **Merge** icon () to merge the release label to a branch.
7. Click on the **Edit** icon () to update the Release Label information if required. You can also use the **`Search`** box to filter the results based on the label name.
8. Click on the **Delete** icon () to delete a Release Label. This process cannot be undone.
9. Click **`Create Artifact`** to manually create a package that got failed or was not prepared. This option will not be clickable if the package creation has been completed or is in progress. This option will be available for orange and red release labels but not for green.
{% hint style="warning" %}
On the **New Deployment** page, for the **Release Label** dropdown, the new release labels for which the package has been successfully prepared will be shown. The dropdown menu will not show Release labels created before the ARM **22.3** release.
To manually prepare the package, use the **Create Artifact** button. The release label will then be available for deployment.
{% endhint %}
---
# Agent Instructions
This documentation is published with GitBook. GitBook is the documentation platform designed so that both humans and AI agents can read, navigate, and reason over technical content effectively. Learn more at gitbook.com.
## Querying This Documentation
If you need additional information that is not directly available in this page, you can query the documentation dynamically by asking a question.
Perform an HTTP GET request on the current page URL with the `ask` query parameter, and the optional `goal` query parameter:
```
GET https://knowledgebase.autorabit.com/product-guides/arm/arm-features/version-control/change-labels/release-labels.md?ask=&goal=
```
`ask` is the immediate question: it should be specific, self-contained, and written in natural language.
`goal` is optional and describes the broader end goal you are ultimately trying to accomplish on behalf of the user. GitBook uses it to tailor the answer towards what is most useful for that goal.
The response will contain a direct answer to the question and relevant excerpts and sources from the documentation.
Use this mechanism when the answer is not explicitly present in the current page, you need clarification or additional context, or you want to retrieve related documentation sections.