> For the complete documentation index, see [llms.txt](https://knowledgebase.autorabit.com/llms.txt). Markdown versions of documentation pages are available by appending `.md` to page URLs; this page is available as [Markdown](https://knowledgebase.autorabit.com/product-guides/arm/arm-features/version-control/ez-commits/how-do-i-commit.md).
# How Do I Commit?
### How do I commit?
The article below discusses performing an EZ-Commit in ARM and committing the necessary code changes to a target branch.
The **New EZ-Commit** screen is best viewed when the zoom setting is set to **80%** on your Chrome/Firefox browser.
#### Step 1: Initial Phase
1. Log in to your ARM account.
2. Hover your mouse over the [**`Version Control`**](https://www.autorabit.com/blog/8-benefits-of-version-control-in-salesforce-development/) module and select **`Commits`**.
3. Click on the **`New EZ-Commit`** button.
4. On the next screen, select the source [**`Salesforce Org`**](https://knowledgebase.autorabit.com/docs/salesforce-org) from which the changes will be retrieved.
5. Select the user registered for the above Salesforce org.
6. Select the version control **`Repository`** and the **`Branch`** where the changes will be committed. For Version Control as GIT type, the user can create a new branch from the EZ-Commit user interface.
***\*\*\*\*\*The branch creation process in ARM has been enhanced to improve responsiveness by creating the branch instantly using the GitHub API when the user initiates the action. This allows users to access and start working on the branch immediately without any delay. The required registration process is handled asynchronously in the background, ensuring a seamless experience without impacting performance or existing repository integrity.***
***Note: This optimized flow is applicable only when GitHub Pull Request functionality is enabled for the repository; otherwise, the system will fall back to the existing branch creation process.***
{% hint style="info" %}
**Important Notes:**
1. There is a provision to choose **`All`** in the **`Salesforce Org Author`** field. Upon selection, this commits changes across the org irrespective of the user registered to that Salesforce org.
2. In addition to the ALL provision, any Salesforce Org Authors who have access to create, edit, or delete data through either profile or permission-set assignments will be listed and can be selected individually.
3. These options are accessible only to ARM administrators or users who have permission to commit on behalf of others.
4. When **Skip Mapping** is set to false, users cannot choose associated child branches of a mapped branch. In the recent release, ARM reads the mapped branch for your version control repository and displays the related child branches during commit, even if skip mapping is disabled.
{% endhint %}
5. Under the **`Fetch Changes`** tab, select how the components are to be fetched from the above-selected source org.
6. Under the **`Fetch Changes`** tab, select how the components are to be fetched from the above-selected source org.
* **`Metadata Components:`** When selected, this retrieves all the metadata components available in the source Salesforce Org. Different ways to fetch the [**`Metadata Components`**](https://www.autorabit.com/blog/7-salesforce-security-concerns-relating-to-metadata/)are:
1. **`Auto Draft:`** This brings all the changes the author has made in the Salesforce org that is not yet committed to the Version Control (ARM does the calculation by using the last modified date in the Salesforce Org and comparing it against the last commit date to Version Control branch).
1. **`Select Manually:`** Choose the metadata components individually to be committed to the destination branch.
2. **`Package Manifest:`** A package .xml file controls which metadata types and members are retrieved and deployed from the source org to the destination org. This type of file is also known as the project manifest. This control file allows you to initiate a commit process without manually selecting individual metadata components.
{% hint style="info" %}
**Important Note:**
Under the **`Package Manifest`** option, you can find the checkbox **`Apply Auto Draft`**.
* If you click the checkbox above, the metadata components in the uploaded XML file will be compared to your source control and Salesforce, and any modified/added components will be displayed on the next Commits screen.
* If left unchecked, the components will be compared only with Salesforce, and any changed or newly added components will be shown on the next screen.
{% endhint %}
#### Choosing between Auto Draft and Select Manually
EZ-Commit provides different ways to retrieve Salesforce metadata changes depending on the developer’s intent.
Use **Auto Draft** when you want ARM to identify metadata changes from the Salesforce org that have not yet been committed to the selected version control branch. Auto Draft performs metadata analysis and comparison work, so the time required depends on the size and complexity of the Salesforce org.
Use **Select Manually** when you already know which metadata components need to be committed. This path avoids the full Auto Draft analysis and allows you to choose the required components directly.
For large Salesforce orgs, Auto Draft can take longer because ARM must evaluate a larger metadata set. If the developer already knows the target components, Select Manually is the recommended and faster workflow.
* **`Re-use Previous Validated Commit Label:`** If you placed changes related to a user story or task, etc., under a specific commit label, you can choose the same in this field. The main advantage of creating a commit label is to reuse the labels and perform multiple commits under a given label.
* **`Vlocity Components:`** This option exports Vlocity data packs from a Salesforce org through a YAML manifest describing your project and committing the same to a VCS. The primary goal is to enable [Continuous Integration](https://www.autorabit.com/ebooks/how-banks-benefit-from-continuous-integration-and-delivery/) for Vlocity metadata through source control.
{% hint style="info" %}
**Important Note about Review Artifact:**
* You can create a review of selected artifacts or a module or collection.
* You can designate other team members as participants in the review. Depending on their assigned role in the review, participants receive requests and can approve, disapprove, or abstain from reviewing each artifact.
* When you download the file through Review Artifact and edit the changes locally, you must upload the zip file with the same name if you have hit the previous button on the commit screen; otherwise, you will encounter the error below: \

{% endhint %}
To view changes to Salesforce metadata, edit them, and see the impact to ensure that your changes are correct, follow these steps:
1. Select the Review Artifact option while performing an EZ commit.
2. The Review Artifact screen will contain a **compare changes icon** that you can click on to view and edit any discrepancies that were identified with the artifacts:
3. When you edit any of the code in the integrated development environment (IDE) and save the changes, the 'Compare Changes' screen should automatically reflect the current changes, highlighting the modifications with a color difference to distinguish between what has been changed and what has not.
4. If you open the 'Compare Changes' screen and perform edits on any of the artifacts and then click on the close button, the system will navigate back to the 'Review Artifact' screen, and any new changes made will be reflected in the 'Compare Changes' screen.
5. If you are in the 'Review Artifact' screen and perform additional changes, once the changes are saved, the 'Compare Changes' screen will pick up the new changes and update the screen to reflect the most recent modifications.
If you check the **Review Artifact** box and choose only commit options for Profile/PermissionSet, the artifacts option will be ignored. The flow will continue with only commit options for Profile/PermissionSet.
* Under the **`Perform`**section, you have different options:
1. **`Validation of Changes (Before Commit):`** ARM allows performing a validation deployment before committing the changes. This command creates the validation deployment without committing any changes to the repository. If the deployment is successful, the commit is executed.
2. **`Commit (Without Validation):`** Directly commit to your Version Control System without extra validations.
3. **`Create a Pull Request:`** Create a pull request to propose and collaborate on changes to a repository. These changes are proposed in a branch, which ensures the master branch only contains finished and approved work.
* Under the **`Post Commit`** section, you can invoke certain processes after the commit is completed.
1. **`Create/Append Revision to existing Label`**
* **`Commit Label:`** Commit Label helps to label a commit. For example, for changes related to a user story or task, etc., under a specific label, you can reuse the labels and perform multiple commits under a given label. Select the label from the dropdown or create a new one by clicking the + icon.
* **`Release Label:`** A Release Label is created by grouping multiple EZ-Commit labels as a singular release label.
* **ALM Label:** Users have the option to commit using solely the ALM Label or by choosing "None." This is applicable when the ALM item has been mapped in the Salesforce Org Management mappings section and the skip mappings option is not enabled. As part of this process, an ALM Label is generated post-commit and is visible under "Change labels" in the ALM Labels panel.
6. Click **`Next`**.
#### Step 2: Selecting the Components
The next screen will list the metadata types and their corresponding members. You will find 3-4 tabs as detailed below:
1. **`All Metadata Components:`** All metadata components available for your source org are listed here. Select the components you want to commit to the Version Control Branch.
2. **`Deleted:`**ARM compares the change with the Source Org and the Version Control Branch and lists all the available components. If you want to delete those components from the branch while committing, you can select those components in this tab.
{% hint style="info" %}
**Important Consideration:** If you delete any metadata with permissions on any profile/permissionsets, then all the profiles and permissionsets associated with that metadata are also updated.
{% endhint %}
3. **`Selected:`** Total selected components are displayed in this tab. The metadata components newly added or updated in the destination branch are shown as A/M (Added/ Modified), and the components to be deleted from the destination branch are shown as D (Deleted) under the **Action** tab.
The next screen is displayed based on your commit process selection (prevalidate commit or commit only).
#### Step 3: Commit Settings
**A. For Validation of Changes (Before Commit)**
ARM allows performing a validation deployment before actually committing the changes.
1. Under the **`Validation Report`** section, you can:
1. **`Generate Diff Report at current Head:`**Select this option to auto-generate a code difference report upon commit completion.Important Note:In some scenarios, this option is selected by default. This usually occurs if you set the criteria for the commit process globally, which enables you to generate a Diff Report by default. Your commit criteria are under the **`My Account > Commit Validation - Approval Settings`** section. However, remember that once the criteria is set, the commit is automatically rejected if you deselect the **`Generate Diff Report`** checkbox.
2. **`Run Static Code Analysis:`** You can initiate a [Static Code Analysis tool](https://www.autorabit.com/products/codescan/) to identify potential software quality issues before the code moves to production. Like **`Generate Diff Report at current HEAD`**, this option is auto-selected by default if the criteria are set globally (under the **`My Account > Commit Validation - Approval Settings`** section).
* For *ApexPMD*, *Checkmarx*, *CodeScan*, and *SonarQube*: ARM allows you to set the criteria for running the SCA tool, whether to run on all supported metadata types from the full source or to run on the newly added components:
* **All Supported Metadata Types:** This option executes a comprehensive security analysis across all selected metadata components, irrespective of their creation or modification timestamps. This approach is recommended for complete security audits.
* **Only Newly Added Supported Metadata Types:** This option performs a targeted analysis, focusing solely on metadata components created on a specific date. It is designed to evaluate recent additions efficiently.
* Furthermore, for *CodeScan* and *SonarQube*, ARM allows you to **`Select Baseline Branch`** from the drop-down list.
3. **`Validate Deployment:`** This feature allows you to validate code across multiple Salesforce orgs simultaneously, with independent Apex test class selection and skip member options for each org.
#### Selecting Salesforce Orgs for Validation
* Click on the option to select Salesforce orgs for validation.
* A dropdown will appear, displaying your available Salesforce orgs.
* Choose up to 3 orgs by clicking the checkbox next to each desired org.
#### Setting Apex Test Levels (Individual)
* Select the option within each org section and locate the option to set the Apex test level.
* Choose the desired test level (e.g., Class, Suite, Organization) for each org independently.
#### Skip Members Option
* The "Skip Members" checkbox will only be visible if any of the selected Salesforce orgs are configured to skip members during validation.
* If enabled, you can choose to skip specific members from the validation process for each org where skipping is configured.
#### Selecting Test Classes
* You'll find a dedicated section for each chosen Salesforce org to select test classes. This section is labeled "Test Classes."
* Within each org section, browse or search for the available test classes associated with that specific org.
* To select the desired test classes for each org, click the checkbox next to each class you want to include in the validation.
2. Under the **`Validation Settings`**, users are prompted to enter the commit label, commit message (if any), and reviewer email ID(s) to send an email notification of the commit process performed and the difference reports. Additionally, there are various options you can configure:
1. **`Commit WaveXMD Components:`** Upon selection, this checkbox allows you to choose the respective Wave XMD files belonging to the Wave dashboard metadata. This checkbox is hidden if the 'WaveDashboard' metadata type or its corresponding members are not picked.
2. **`Commit Options for Profile:`** This option lets you choose to commit settings for a full profile operation.
* **`Commit Access Settings for selected metadata (Profiles ONLY):`** This allows you to perform the commit operation based only on the profiles available for the selected metadata.
* **`Commit Full Profiles:`** Commits the profiles irrespective of the selected Metadata.
3. **`Commit Options for PermissionSets:`** This option allows you to choose to commit settings for permission set operation.
* **`Commit Access Settings for selected metadata (PermissionSets ONLY):`** Commits the permission of the metadata members for permission set metadata you have worked on or modified.
4. **`Remove IP Ranges:`** This removes the IP range from your profile/permissionsets when committing them.
5. **`Remove User Permissions:`** This removes the user permissions from your profile or permissionsets when committing them. By default, it applies to profiles and not permissionsets.\
\
**Important Points to Note:**
* Only if both the profile and permissionsets files are selected for commit will the **`Remove User Permissions`** checkbox appear.
* By default, **`Remove User Permissions`** only applies to profiles, not permissionsets.
* If you choose the **`Commit Options for PermissionSet`** option, the **`Remove User Permissions`** checkbox is accessible.
* If you check the **`Remove User Permissions`** checkbox without selecting the **`Commit Options for PermissionSets`** checkbox, the Remove User Permissions only applies to profiles, not permissionsets.
6. **`Ignore Missing Visibility Settings:`** With this option, differences in visibility settings between the source and destination orgs will not cause the deployment to fail. ARM will compare the source and destination orgs and keep only the common settings between both orgs.\
\
**Important Note:**\
**Standard fields** are not supported for **Ignore Missing Visible Settings**.
7. **`Ignore installed components:`** When selected, ARM will scan for the components that are deployed, and if there are any managed package components located in the destination branch, these components will be excluded from the metadata.zip files when the remaining components are deployed.
3. **`Apply Search and Substitute Rules:`** If you created search and substitute rules to define custom find and replace rules which ARM applies whenever you commit and deploy files from one Sandbox to another Sandbox, one Sandbox to Version Control, or vice-versa, that rule can be found here.
4. Click **`Finish`**. View your recently created EZ-Commit in the [Commits](/product-guides/arm/arm-features/version-control/ez-commits/commits-summary.md) screen.
**B. For Commit Only (Without Validation)**
Directly commit to your Version Control System without extra validations. Different options to choose from include:
1. **`Commit WaveXMD Components:`** When selected, this checkbox allows you to choose the respective WaveXMD files belonging to the wave dashboard metadata type and commit them to the target branch. This checkbox is hidden if the **'WaveDashboard'** metadata type or its corresponding members are not picked.
2. **`Commit Options for Profile:`**This option lets you choose to commit settings for a full profile operation.
* **`Commit Access Settings for selected metadata(Profiles Only): This allows`** you to perform the commit operation based on the profiles available only for the selected metadata.
* **`Commit Full Profiles:`** Commit the profiles irrespective of the selected metadata.
3. **`Commit Options For PermissionSets:`**This option allows you to choose to commit settings for a permission set operation.
* **`Commit Access Settings for selected metadata (PermissionSets Only):`** Commits the permissions of the metadata members for permission sets metadata you have worked on or modified.
4. **`Remove IP Ranges:`** This removes the IP range from your profile/permissionsets when committing them.
5. **`Remove User Permissions:`** This removes the user permissions from your profile or permissionsets when committing them. By default, it applies to profiles and not permissionsets.Important Point to Note:
* The **`Remove User Permissions`** checkbox appears the profile and permissionsets files are selected for commit.
* By default, **`Remove User Permissions`** only applies to profiles, not permissionsets.
* If you choose the **`Commit Options for PermissionSet`** option, the **`Remove User Permissions`** checkbox will be accessible.
* If you check the **`Remove User Permissions`** checkbox without selecting the **`Commit Options for PermissionSets`** checkbox, the Remove User Permissions will only apply to profiles, not permissionsets.
6. **`Apply Search and Substitute Rules:`** If you created search and substitute rules to define custom find and replace rules, which ARM applies when you commit and deploy files from one Sandbox to another Sandbox, one Sandbox to Version Control, or vice-versa, that rule can be found here.
7. **`Commit Comment:`** Comment or add additional information, if any.
8. Click **`Finish`**. View your recently created EZ-Commit in the [Commits](/product-guides/arm/arm-features/version-control/ez-commits/commits-summary.md) screen.
{% hint style="info" %}
**Note:** For Non-DX Branches, if you wish to commit only the minimal metadata structure of a custom object, you can use the following XML template. This can be achieved by enabling the review artifact feature in AutoRABIT EZ-Commit. Use the inline IDE editor to adjust the XML as needed (ensure the XML is valid and remains deployable before committing).
**Sample Minimal XML Format for a Custom Object:**
\\
\\
\Deployed\\
\\
\\
\\
\Text\\
\\
\Books\\
\ReadWrite\\
\
If the same object already exists in the target branch or org and you attempt to edit it, you may encounter a "no modifications" popup. This approach is applicable only for creating brand-new objects.
{% endhint %}
## Frequently Asked Questions
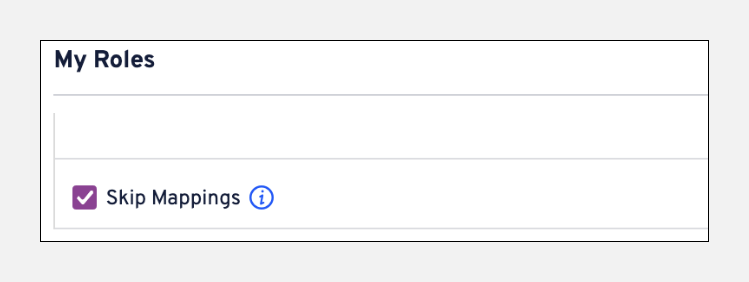
### Why can I only see the Production org and none of the development instances when I try to do a new EZ commit?
This is happening because the skip mapping feature isn't switched on. Select **"Skip Mappings"** from the dropdown menu in **My Profile > My Roles**.
### Why does my delta fail with the error 'REJECTED\_NONFASTFORWARD' when trying to create a commit?
Suppose the error REJECTED\_NONFASTFORWARD is thrown in your EZ-Commit; in that case, the issue is specific to your repository, and the error occurs at the GIT version control level when multiple developers try to modify a file simultaneously. If you reencounter this issue, please wait a few minutes and reattempt the commit.
### Why is the API name change showing under Deleted Components in Commit?
When there is an **API name change**, Salesforce considers it a **new metadata API** while the retrieved call occurs.
When committing such API name change components, please select the new API name, and the older one can be deleted as a destructive commit.
Now, while deploying these changes, we recommend using the **Pre-destructive** option to deploy the deleted one first, and then the actual API name change components get deployed.
### Why can't I see any Salesforce Orgs or Version Control repositories while performing an EZ-Commit?
Salesforce Orgs are displayed on the EZ-Commit screen if an admin selects the **Skip Mappings** checkbox on the **Profile** page.\
**Profile > My Roles > Skip Mappings**
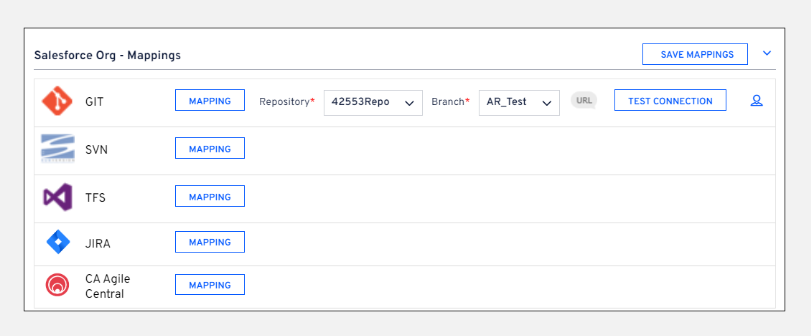
If the admin does not enable **Skip Mappings**, users must map their respective **Version Control repository** branch to their **Salesforce Org:** Go to **Admin > Salesforce Org Mgmt > Selected Salesforce Org > Salesforce Org- Mapping**, then map the respective branches individually.
To avoid this, contact your admin to select the **Skip Mappings** checkbox under the **My Roles** section on the **Profile** page. More information on how to map a branch to a Salesforce org is available [here](https://knowledgebase.autorabit.com/docs/salesforce-org-management#salesforce-org-mappings).
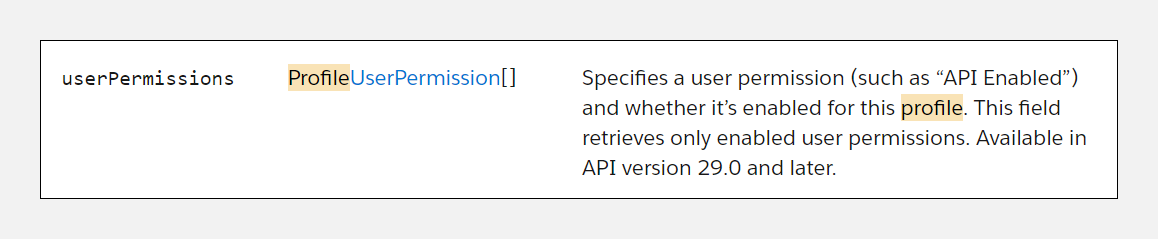
### How can I commit restricted 'Profile User Permissions'?
CommentShare feedback on the editorDue to limitations from Salesforce, **User Permissions** set to **`False`** cannot be retrieved via **Metadata API** call. Hence, those changes are not displayed under the **File Diff** report in **EZ-Commit** for **Profiles**. This is an expected behavior. For more information on the Profile Metadata, click [here](https://developer.salesforce.com/docs/atlas.en-us.api_meta.meta/api_meta/meta_profile.htm?q=profile).CommentShare feedback on the editor
### Why are metadata members added to or removed from the package.xml during a commit, even if they are not part of the commit?
The metadata members present in the **target branch** are added to the **package.xml**, and those absent from the **target branch** are removed. Verify that the deleted members no longer exist and the added members are listed in the target branch of your version control repository.
### Why are Wave Components missing from the component list during EZ-Commit despite being listed as 'Included Metadata Types' in the Salesforce settings?
If the user who registered the SF Org in ARM has no **Einstein Analytics license**, Wave Components do not appear under metadata members in EZ-Commit.
### Why is my EZ-Commit revert failing with an "Invalid ID" error?
Sometimes you need to undo or reverse a single commit while working with a version control system. This is helpful if you're trying to track down a bug and discover that a single commit caused it. You can use revert commit to do this for you instead of manually going in, correcting it, and committing a new snapshot. When a user tries to reverse the EZ-Commit, it fails with an exception. The expected behavior is to revert the EZ-Commit as per the design and create a new commit.
In this scenario, the feature's proper operation requires a successful commit on the branch. Users should have the following privileges to revert commits in AutoRABIT:
1. **Commit Author:** User who has created the commit
2. **Org Administrator** and
3. Users with **Revert Commits** permission
#### Step-by-Step Guide:
Here are the steps to reproduce the scenario:
1. Create a commit from the source to the destination branch.
2. Commit some data.
3. Once the commit is successful, go to commit history, and for the commit, click on three dots.
4. Click on the revert commit option. It will create a new job for the revert.
5. This will fail with the error/exception Invalid ID.
### Can I deploy/commit system permission sets to ARM?
By default, when we commit by selecting only Profile metadata, it retrieves User Permissions and IP ranges. However, it depends on what kind of system permissions you're looking for, and if it has metadata API retrieval support from Salesforce, then it is possible to commit via AutoRABIT.
### Why does Auto Draft take longer than Select Manually?
Auto Draft analyzes metadata changes in the Salesforce org and compares them with the selected version control branch. The time required depends on the number of metadata components and the complexity of the org. In large orgs, Auto Draft may take longer because there is more metadata to evaluate.
If you already know which components need to be committed, use **Select Manually** to go directly to component selection.
---
# Agent Instructions
This documentation is published with GitBook. GitBook is the documentation platform designed so that both humans and AI agents can read, navigate, and reason over technical content effectively. Learn more at gitbook.com.
## Querying This Documentation
If you need additional information that is not directly available in this page, you can query the documentation dynamically by asking a question.
Perform an HTTP GET request on the current page URL with the `ask` query parameter, and the optional `goal` query parameter:
```
GET https://knowledgebase.autorabit.com/product-guides/arm/arm-features/version-control/ez-commits/how-do-i-commit.md?ask=&goal=
```
`ask` is the immediate question: it should be specific, self-contained, and written in natural language.
`goal` is optional and describes the broader end goal you are ultimately trying to accomplish on behalf of the user. GitBook uses it to tailor the answer towards what is most useful for that goal.
The response will contain a direct answer to the question and relevant excerpts and sources from the documentation.
Use this mechanism when the answer is not explicitly present in the current page, you need clarification or additional context, or you want to retrieve related documentation sections.
 ### Why are metadata members added to or removed from the package.xml during a commit, even if they are not part of the commit?
The metadata members present in the **target branch** are added to the **package.xml**, and those absent from the **target branch** are removed. Verify that the deleted members no longer exist and the added members are listed in the target branch of your version control repository.
### Why are Wave Components missing from the component list during EZ-Commit despite being listed as 'Included Metadata Types' in the Salesforce settings?
If the user who registered the SF Org in ARM has no **Einstein Analytics license**, Wave Components do not appear under metadata members in EZ-Commit.
### Why is my EZ-Commit revert failing with an "Invalid ID" error?
Sometimes you need to undo or reverse a single commit while working with a version control system. This is helpful if you're trying to track down a bug and discover that a single commit caused it. You can use revert commit to do this for you instead of manually going in, correcting it, and committing a new snapshot. When a user tries to reverse the EZ-Commit, it fails with an exception. The expected behavior is to revert the EZ-Commit as per the design and create a new commit.
In this scenario, the feature's proper operation requires a successful commit on the branch. Users should have the following privileges to revert commits in AutoRABIT:
1. **Commit Author:** User who has created the commit
2. **Org Administrator** and
3. Users with **Revert Commits** permission
#### Step-by-Step Guide:
Here are the steps to reproduce the scenario:
1. Create a commit from the source to the destination branch.
2. Commit some data.
3. Once the commit is successful, go to commit history, and for the commit, click on three dots.
4. Click on the revert commit option. It will create a new job for the revert.
5. This will fail with the error/exception Invalid ID.
### Can I deploy/commit system permission sets to ARM?
By default, when we commit by selecting only Profile metadata, it retrieves User Permissions and IP ranges. However, it depends on what kind of system permissions you're looking for, and if it has metadata API retrieval support from Salesforce, then it is possible to commit via AutoRABIT.
### Why does Auto Draft take longer than Select Manually?
Auto Draft analyzes metadata changes in the Salesforce org and compares them with the selected version control branch. The time required depends on the number of metadata components and the complexity of the org. In large orgs, Auto Draft may take longer because there is more metadata to evaluate.
If you already know which components need to be committed, use **Select Manually** to go directly to component selection.
---
# Agent Instructions
This documentation is published with GitBook. GitBook is the documentation platform designed so that both humans and AI agents can read, navigate, and reason over technical content effectively. Learn more at gitbook.com.
## Querying This Documentation
If you need additional information that is not directly available in this page, you can query the documentation dynamically by asking a question.
Perform an HTTP GET request on the current page URL with the `ask` query parameter, and the optional `goal` query parameter:
```
GET https://knowledgebase.autorabit.com/product-guides/arm/arm-features/version-control/ez-commits/how-do-i-commit.md?ask=
### Why are metadata members added to or removed from the package.xml during a commit, even if they are not part of the commit?
The metadata members present in the **target branch** are added to the **package.xml**, and those absent from the **target branch** are removed. Verify that the deleted members no longer exist and the added members are listed in the target branch of your version control repository.
### Why are Wave Components missing from the component list during EZ-Commit despite being listed as 'Included Metadata Types' in the Salesforce settings?
If the user who registered the SF Org in ARM has no **Einstein Analytics license**, Wave Components do not appear under metadata members in EZ-Commit.
### Why is my EZ-Commit revert failing with an "Invalid ID" error?
Sometimes you need to undo or reverse a single commit while working with a version control system. This is helpful if you're trying to track down a bug and discover that a single commit caused it. You can use revert commit to do this for you instead of manually going in, correcting it, and committing a new snapshot. When a user tries to reverse the EZ-Commit, it fails with an exception. The expected behavior is to revert the EZ-Commit as per the design and create a new commit.
In this scenario, the feature's proper operation requires a successful commit on the branch. Users should have the following privileges to revert commits in AutoRABIT:
1. **Commit Author:** User who has created the commit
2. **Org Administrator** and
3. Users with **Revert Commits** permission
#### Step-by-Step Guide:
Here are the steps to reproduce the scenario:
1. Create a commit from the source to the destination branch.
2. Commit some data.
3. Once the commit is successful, go to commit history, and for the commit, click on three dots.
4. Click on the revert commit option. It will create a new job for the revert.
5. This will fail with the error/exception Invalid ID.
### Can I deploy/commit system permission sets to ARM?
By default, when we commit by selecting only Profile metadata, it retrieves User Permissions and IP ranges. However, it depends on what kind of system permissions you're looking for, and if it has metadata API retrieval support from Salesforce, then it is possible to commit via AutoRABIT.
### Why does Auto Draft take longer than Select Manually?
Auto Draft analyzes metadata changes in the Salesforce org and compares them with the selected version control branch. The time required depends on the number of metadata components and the complexity of the org. In large orgs, Auto Draft may take longer because there is more metadata to evaluate.
If you already know which components need to be committed, use **Select Manually** to go directly to component selection.
---
# Agent Instructions
This documentation is published with GitBook. GitBook is the documentation platform designed so that both humans and AI agents can read, navigate, and reason over technical content effectively. Learn more at gitbook.com.
## Querying This Documentation
If you need additional information that is not directly available in this page, you can query the documentation dynamically by asking a question.
Perform an HTTP GET request on the current page URL with the `ask` query parameter, and the optional `goal` query parameter:
```
GET https://knowledgebase.autorabit.com/product-guides/arm/arm-features/version-control/ez-commits/how-do-i-commit.md?ask=