> For the complete documentation index, see [llms.txt](https://knowledgebase.autorabit.com/llms.txt). Markdown versions of documentation pages are available by appending `.md` to page URLs; this page is available as [Markdown](https://knowledgebase.autorabit.com/product-guides/arm/integration-and-plugins/visual-code-extension/installing-vs-code-extension.md).
# Installing VS Code Extension
This guide covers how to install the AutoRABIT extension in Visual Studio Code and configure the required Salesforce tooling support.
***
## Installing Visual Studio Code Extension
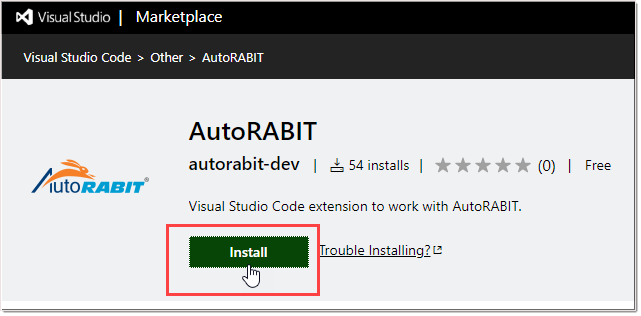
1. Visit the Visual Studio Marketplace and click the **Install** button for the AutoRABIT extension.
2. When prompted, allow your browser to open VS Code. Then, click **Install** again within VS Code to complete the extension installation.
3. Once installed, you will see the **AutoRABIT** logo in the **Activity** bar on the left-hand side of the VS Code interface.
4. On the extension detail page in VS Code, you can review:
* **Feature Contributions**: Commands, view containers, and UI elements added by the extension.
* **Changelog**: Release notes and version history for the extension.
***
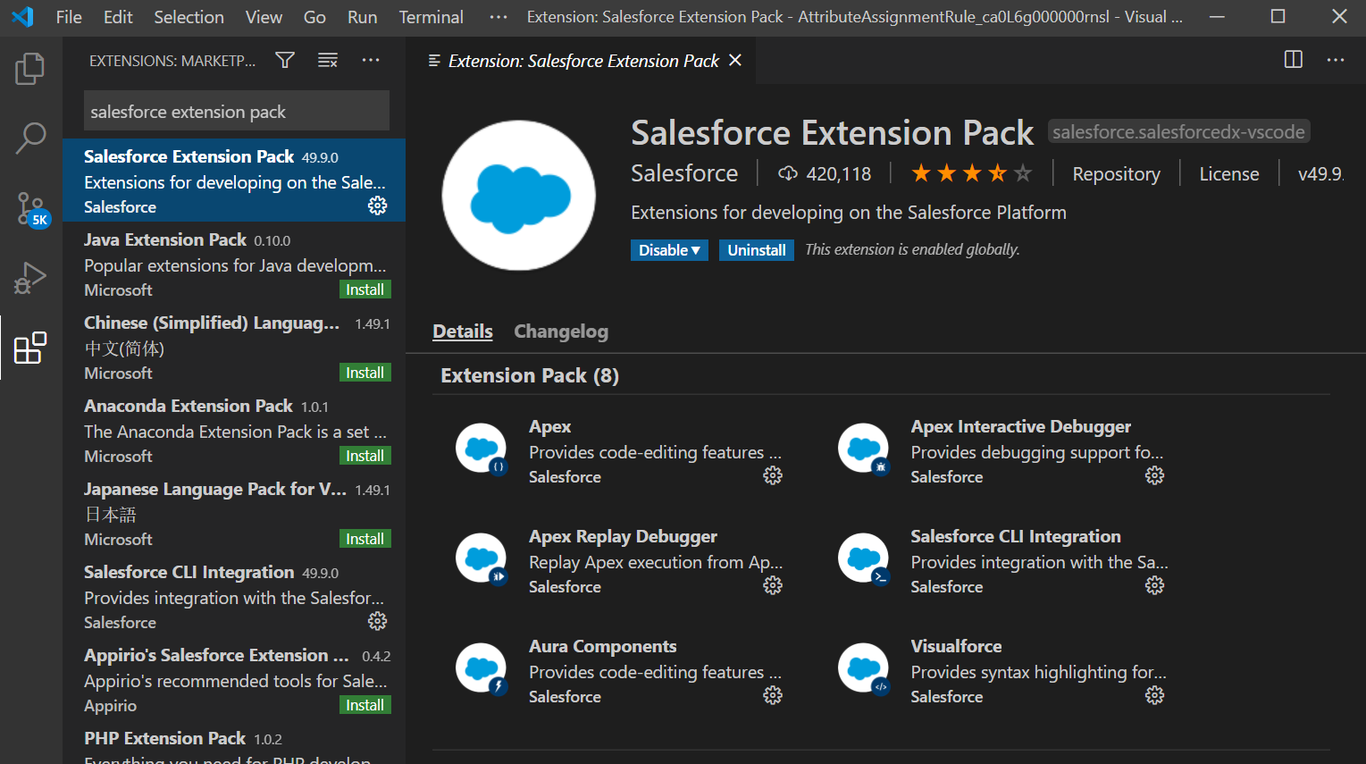
## Installing Salesforce CLI
To enable full Salesforce development support in AutoRABIT and VS Code, install the **Salesforce Extension Pack**:
1. Open VS Code.
2. Click the **Extensions** icon in the Activity bar.
3. Search for and install **Salesforce Extension Pack**.
{% hint style="info" %}
**Important Note:**\
The **Salesforce Extension Pack** installs the following:
* Salesforce CLI Integration
* Apex
* Apex Interactive Debugger
* Apex Replay Debugger
* Lightning Web Components
* Aura Components
* Visualforce
* Salesforce Lightning Design System (SLDS) Validator
{% endhint %}
---
# Agent Instructions
This documentation is published with GitBook. GitBook is the documentation platform designed so that both humans and AI agents can read, navigate, and reason over technical content effectively. Learn more at gitbook.com.
## Querying This Documentation
If you need additional information that is not directly available in this page, you can query the documentation dynamically by asking a question.
Perform an HTTP GET request on the current page URL with the `ask` query parameter, and the optional `goal` query parameter:
```
GET https://knowledgebase.autorabit.com/product-guides/arm/integration-and-plugins/visual-code-extension/installing-vs-code-extension.md?ask=&goal=
```
`ask` is the immediate question: it should be specific, self-contained, and written in natural language.
`goal` is optional and describes the broader end goal you are ultimately trying to accomplish on behalf of the user. GitBook uses it to tailor the answer towards what is most useful for that goal.
The response will contain a direct answer to the question and relevant excerpts and sources from the documentation.
Use this mechanism when the answer is not explicitly present in the current page, you need clarification or additional context, or you want to retrieve related documentation sections.
.png)