Creation of an SVN Branch
Creation of SVN Branch
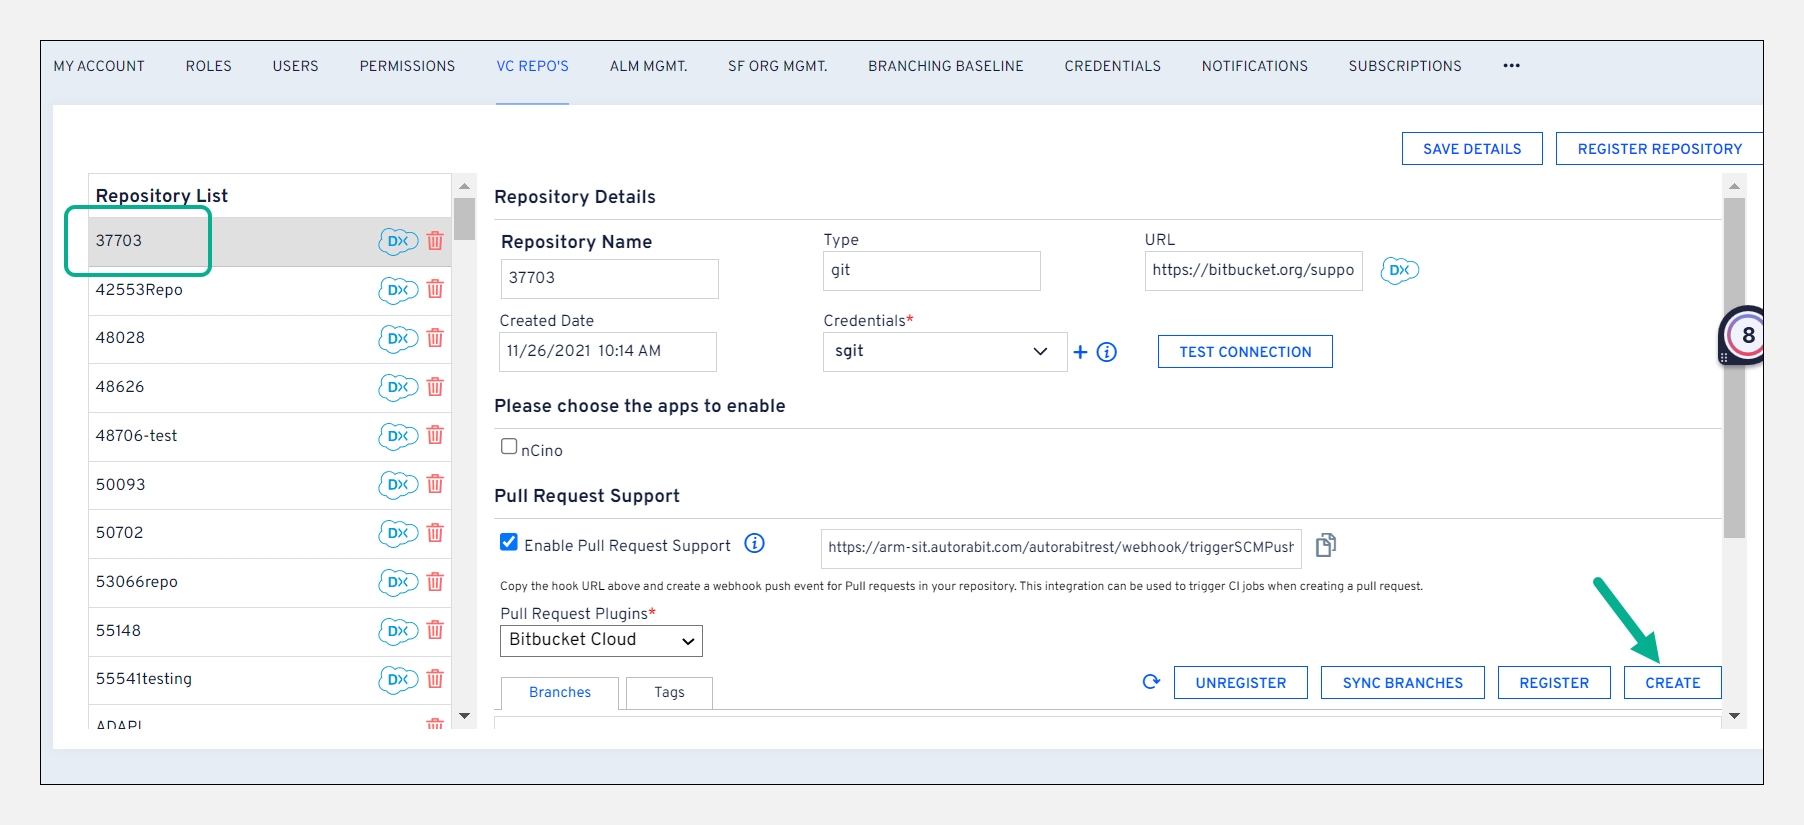
Log in to your ARM account.
Go to the
VC Repo'stab.Select the SVN repository for which the branch needs to be created.
Click on
Createbutton.
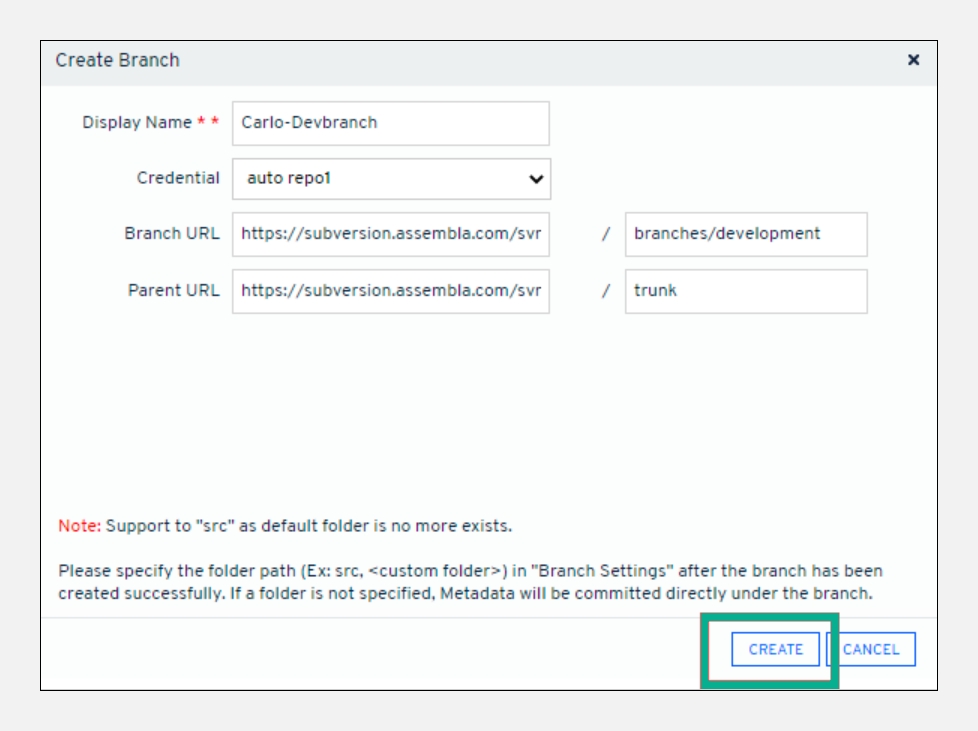
In the
Create Branchscreen, give the branch a name in theDisplay Namefield.Point to Note:The characters "//" \ , * ? & ' " < > | ` ~ ( ) and space are not allowed in theDisplay Namefield.Select your
Credentialfrom the drop-down field.In the
Branch URLfield, enter the branch name beside the parent branch. For example, branches/Development.Parent URLis auto-filled; however, you can modify it (if necessary).Click
Createto complete the creation process.
Registration of an existing SVN branch
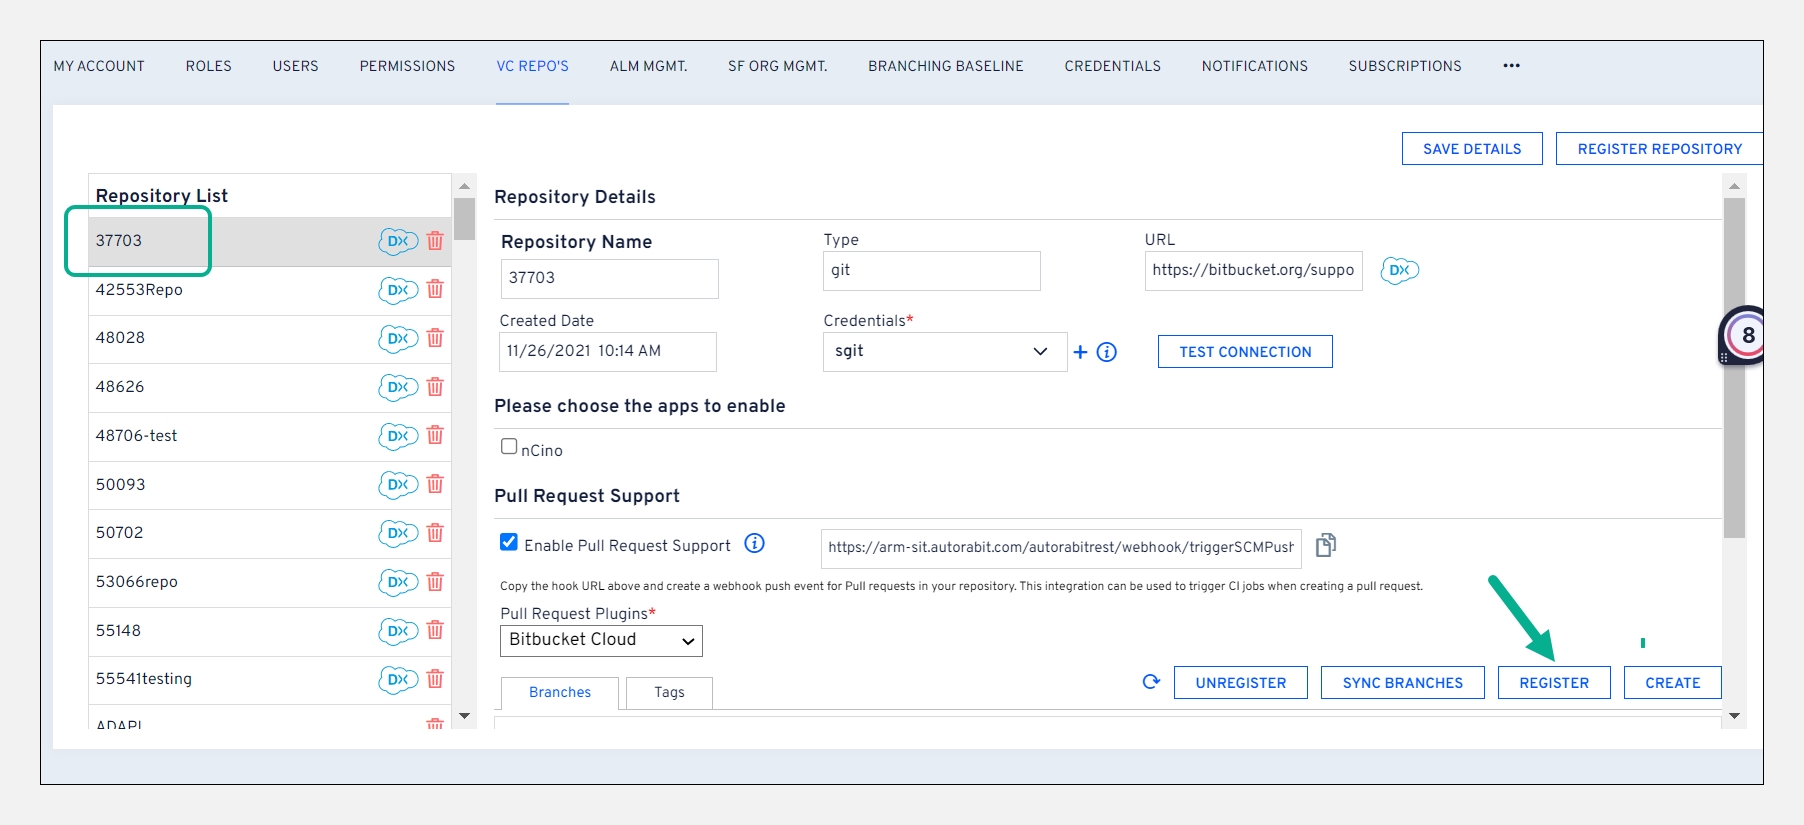
On the
VC Repo'spage, select one SVN repository from theRepository List.
Click
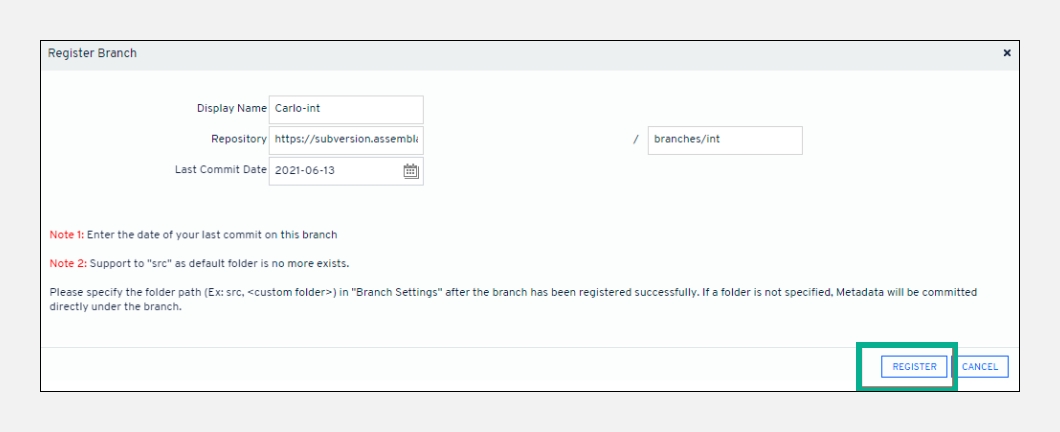
Register.On the next screen, enter the branch name you want to register in ARM.Point to Note:The characters "//" \ , * ? & ' " < > | ` ~ ( ) and space are not allowed in the
Display Namefield.The
Repositoryfield is auto-filled with the repository root. Give a branch name beside the parent branch. For example, branches/Integration.Select the
Last Commit Date. The last commit date fetches changes from Salesforce org in EZ-Commit based on the specified date.Click
Registerto complete the registration of the branch.
Last updated
Was this helpful?

