GIT Branch Creation
Overview
Developers can create a branch to work on a new version of an existing application. Changes in the primary or other branches will only affect your branch if you pull the latest changes from those branches.
Creating a new branch for each task is a common practice because it allows others to identify what changes to expect and, for backtracking purposes, to understand why a particular code change is implemented.
Creation of a GIT Branch
Log in to your ARM account.
From the ARM home page, click on the
Adminmodule and go to theVC Repo'stab.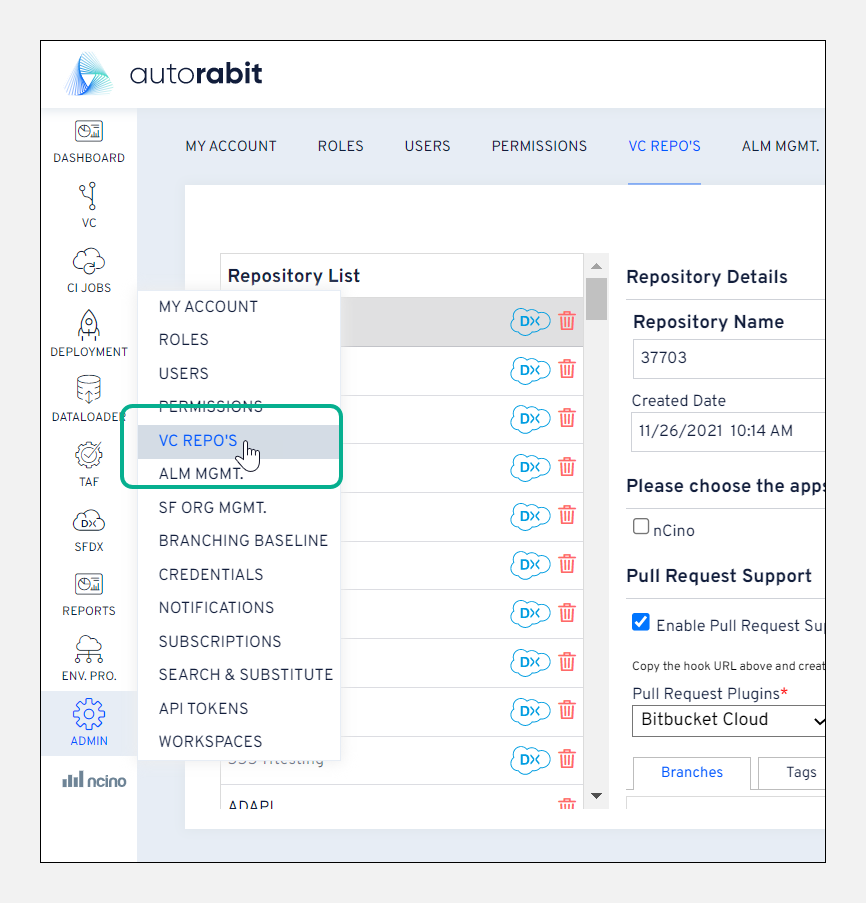
Select a GIT repository for which the branch needs to be created.Note:If your GIT repository is nCino enabled, the nCino logo will be marked in front of your repository.
Under
Branches, click onCreatebutton.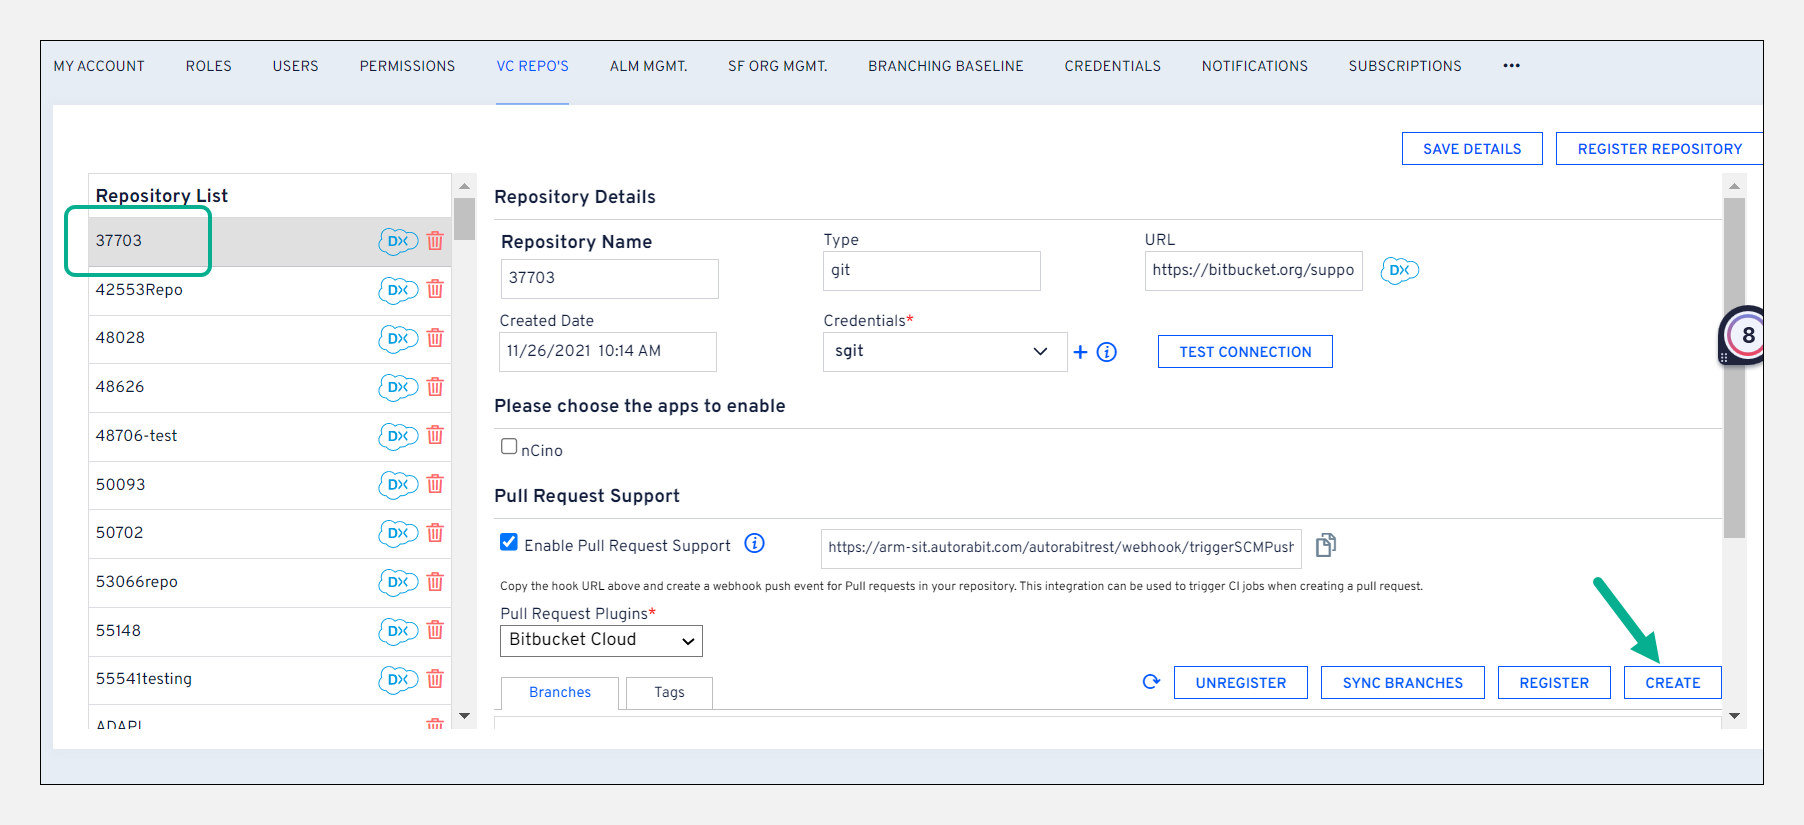
In
Create Branchscreen, give aBranch nameand selectParent BranchandBranch Typefrom the list. If theParent Branchconfigures a metadata folder path, the same configuration will map to the newly created branch.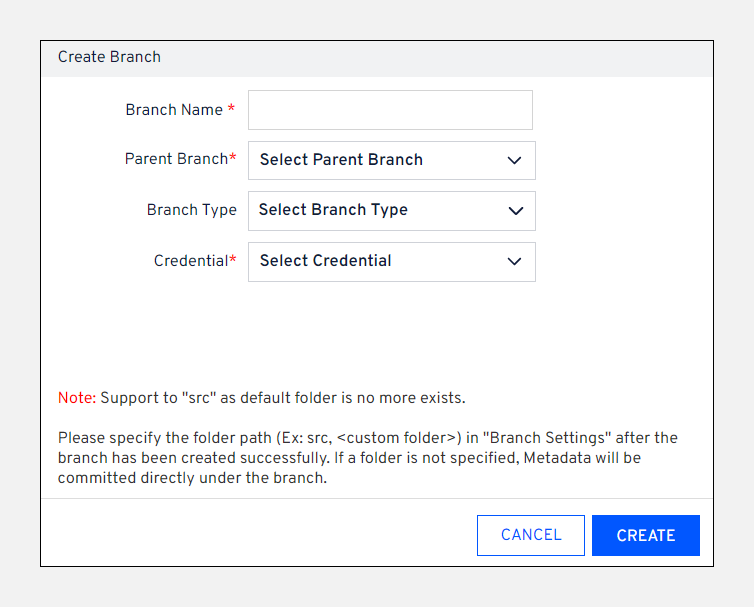
Point to Note: The characters "//" \ , * ? & ' " < > | ` ~ ( ) and space are not allowed in the Branch Name field.
Click
Createto complete the creation process.
Registration of an existing GIT branch
On the
VC Repo'spage, select a GIT repository from the repositories list.Click
Register.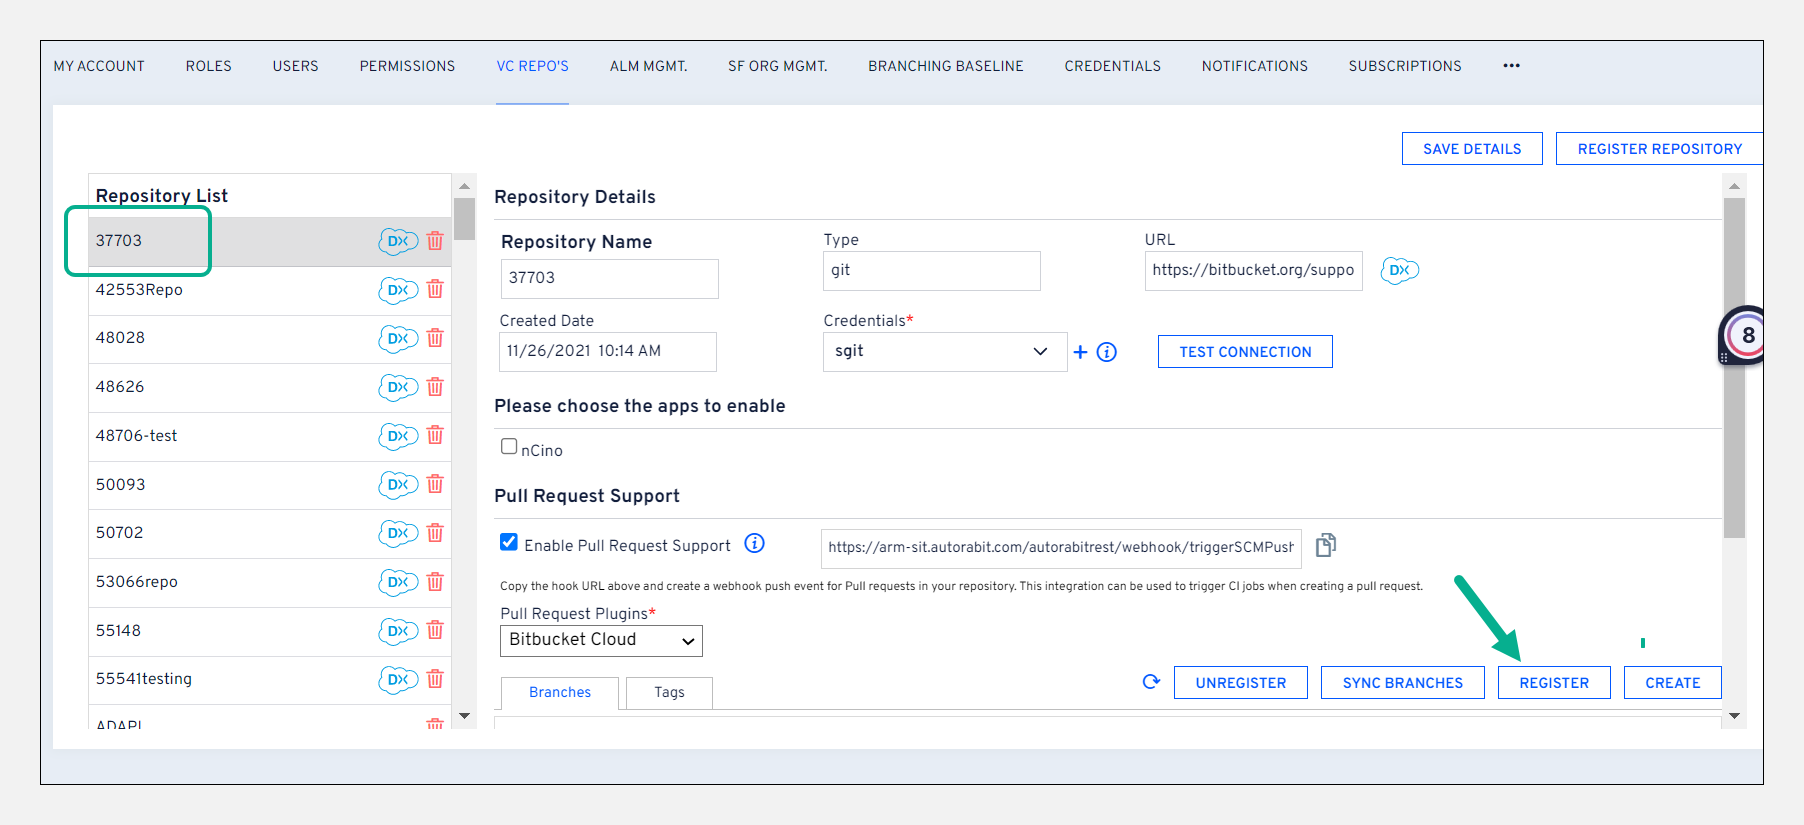
Checkbox the branches you need to register and enter the following details:
Parent Branch:Choose its parent branch from the drop-down.Last commit date: The last commit date is fetched from Salesforce Org in EZ-Commit based on the specified date.
Once done, click
Registerto complete the branch registration.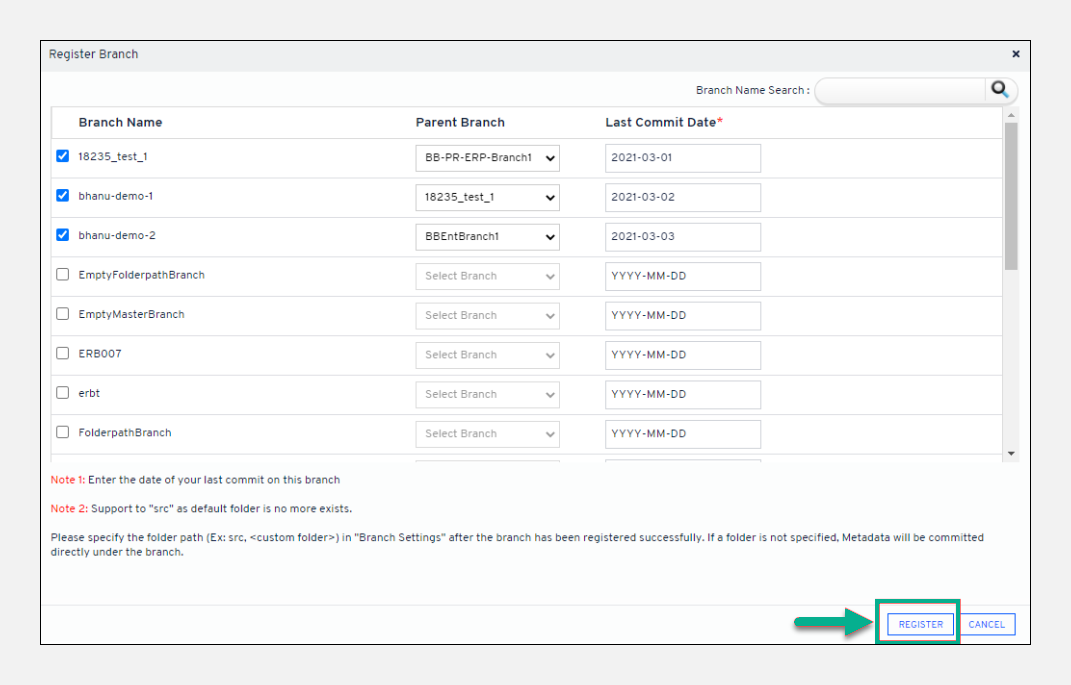
Registration of nCino configured GIT branch
On the
Version Control Repositoriespage, select a GIT repository marked with thenCinologo.Click
Register.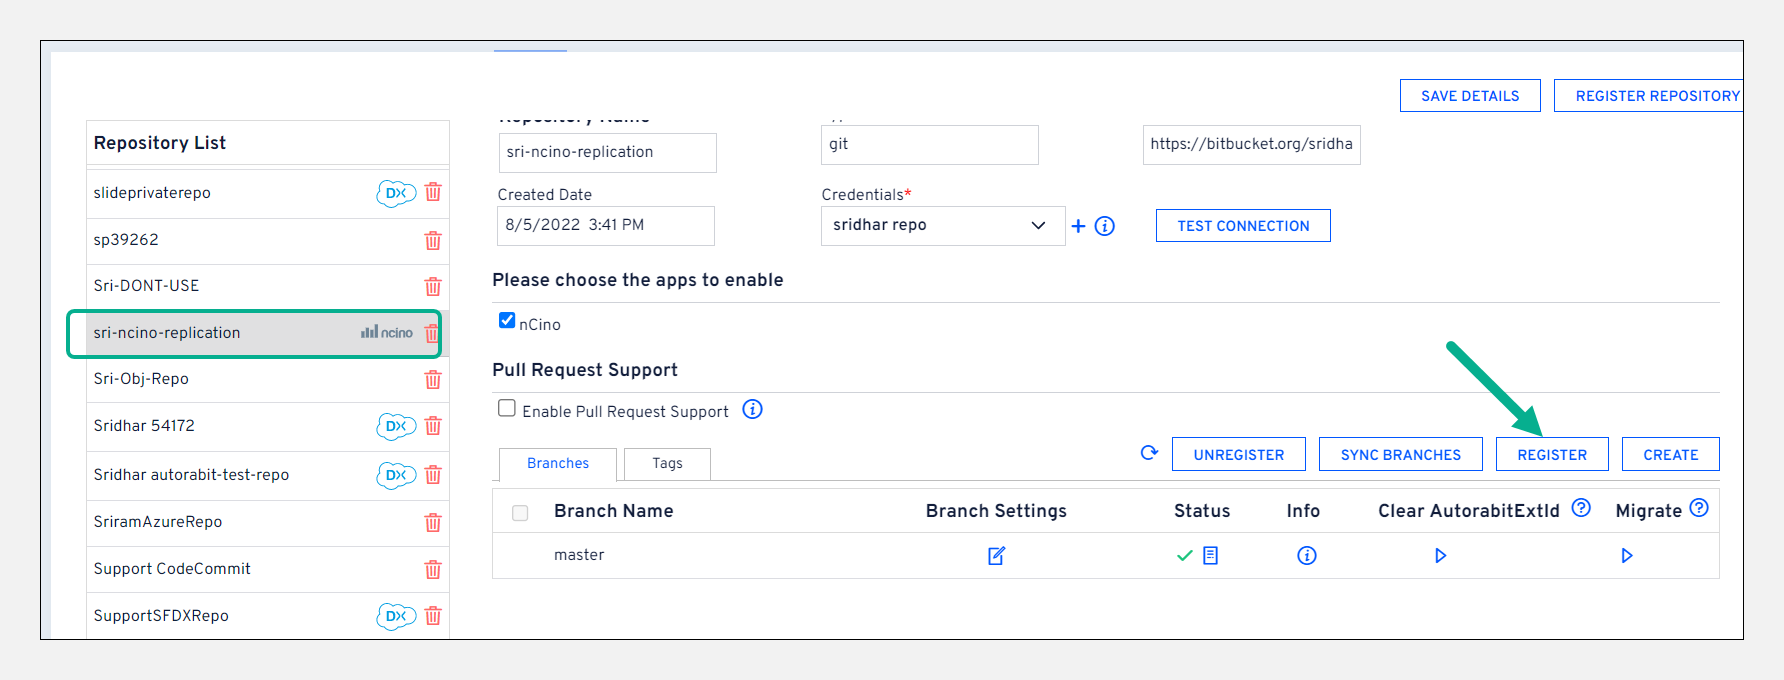
Checkbox the branches you need to register and select its
Parent Branchand last commit date (the last commit date is used to fetch changes from Salesforce Org in EZ-Commit based on the specified date).Click the
Registerbutton to complete the branch registration.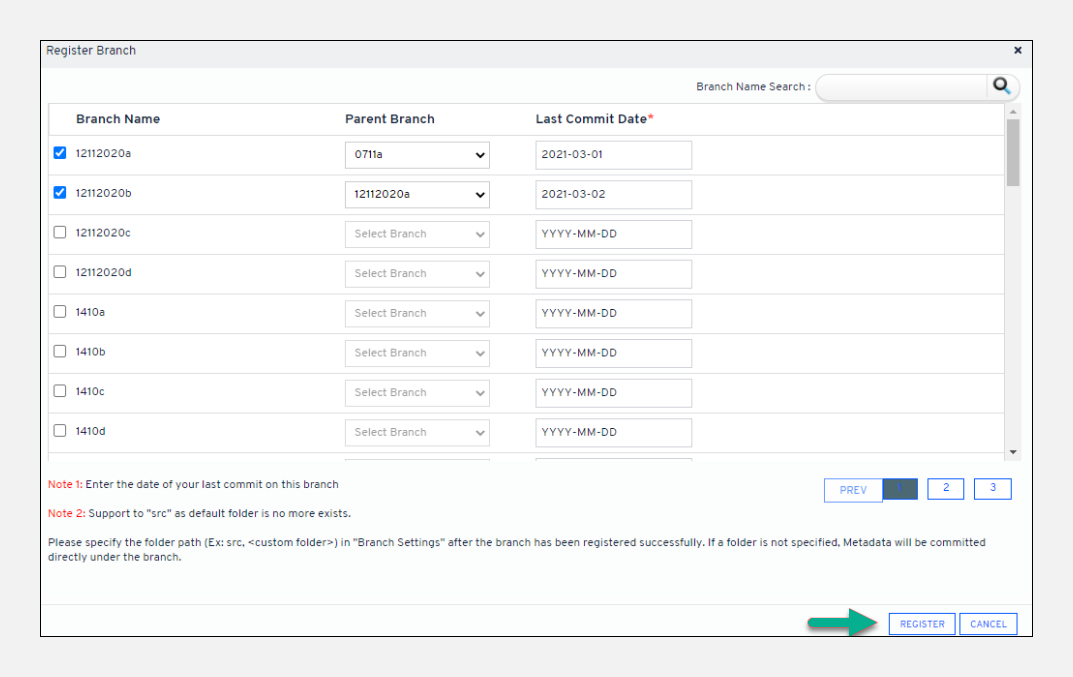
Last updated
Was this helpful?

